


Direct Relationships
How to record Relationships with your Own Organisation, such as a Partner, Customer, Supplier or Prospect relationship.
Creating Relationships between a third party and your Own Organisation
Tip
Searching for “ORG-1” in the Search box will find the first Own Organisation created.
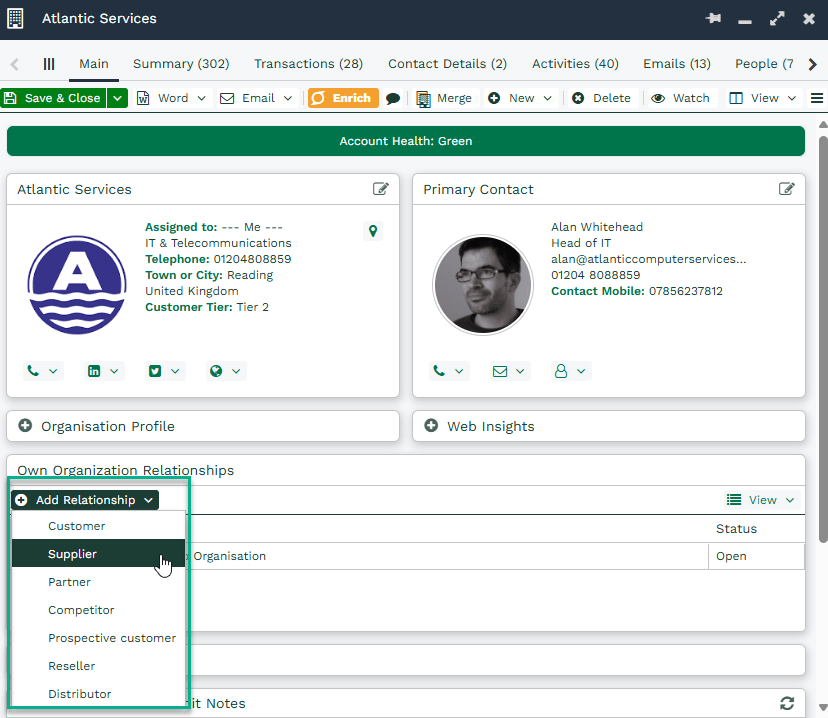
Workbooks allows you to create relationships between an Organisation/Person and your Own Organisation. You can mark an Organisation as being a:
- Customer
- Supplier
- Partner
- Competitor
- Prospective customer
- Reseller
- Distributor
- Finance
Alternatively, you can create your own custom relationship. For example, ABC Company is a Subsidiary of Workbooks Online Limited.
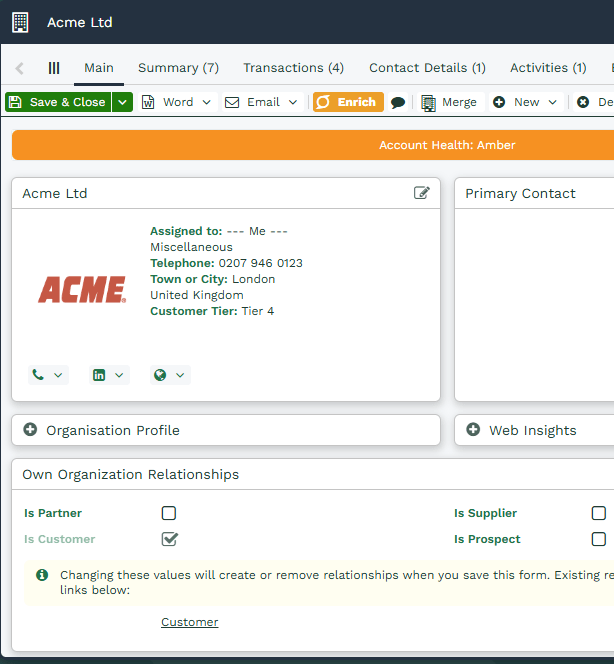
If you are using the checkbox view, which can be change by going into Database Settings, you can still create a relationship; Open the record for the Organisation or Person with whom you want to record a relationship. Click in the checkbox next to Partner, Supplier, Customer or Prospect as appropriate and click “Save“. You can choose one or many of these classifications as the same Organisation or Person could have more than one type of relationship with your Own Organisation. Once you’ve saved the record, you’ll notice a series of links appear below the help text. You can click these links to open up the Relationship record and add additional information as shown above.
Note
In order to set these checkboxes you need the relevant Capabilities. Ask your System Administrator to make sure you've been granted the Capability to Relate own organisation CRM partner/supplier/customer, as appropriate. You don't need any specific Capability to tick the box next to Prospect. If you don't have these capabilities then these checkboxes will be greyed out and non-editable.
Relationship Status
Note
The Relationship Status of a Relationship record is not automatically populated based on the valid from and valid until dates, this will need to be manually changed. You may wish to consider creating an Activity record with a Reminder for the day the relationship expires so that it can be updated.
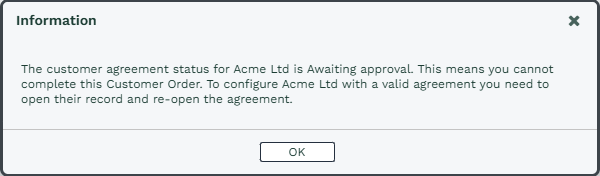
The status of a Relationship controls whether a user can create a Transaction Document against their Own Organisation. If an Organisation is marked as a Customer or Supplier, you can raise an Order, Invoice, Credit Note, Contract or Supplier Order against that Organisation providing they have a valid “Customer” or “Supplier” relationship i.e. the status is set to “Open”. If the status is set to “Awaiting approval”, “Suspended” or “Closed” you will be able to create the order and save it as a DRAFT order but you will not be able to POST the order. Workbooks will prompt you if this is the case, showing the following message:
Note
You can override this restriction if you wish by clicking in the "Customer Checks" section within Database Settings.
Switching between Grid view and Checkbox View
Within Database Settings the view of which you see Own Organisation Relationships can be changed within Database Settings
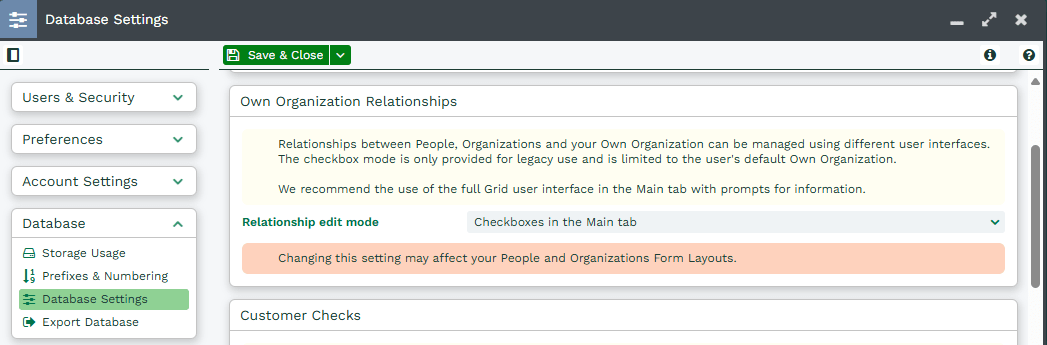
- Checkboxes in the Main tab.
- Grid in the Main tab (create new relationships without prompting) – Turns off the Relationship record prompt and simply creates the specified relationship between two records. The Relationship Status will automatically default to open.
- Grid in the Main tab (prompt for details when creating new relationships) – You will be prompted with a relationship record if you select this option. This allows you to populate any custom fields that you might have previously created.
- In the Organisations tab
If you are using the grid view, this can be customised to show any custom fields that exist on the Party Relationships record type in exactly the same way as Landing Pages and Line Item grid views.
Note
If you have created any custom Form Layouts on People or Organisations, you will need to review the positioning of fields after you have changed this setting to ensure the layout appears as you'd expect.
Creating Relationships between Own Organisations
Finally, Workbooks allows you to create relationships between two Own Organisations. This is useful if you want to relate different branches together, for example, My Organisation and My Organisation Australia.
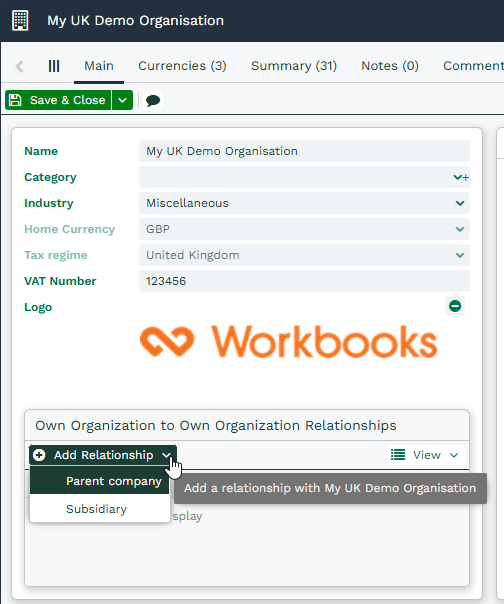
To utilise this type of relationship, open up your Own Organisation record either by searching for your company or from the Configuration landing page (Start > Configuration > Accounting > Own Organisation). Within the grid view on the main tab of the record, click “Add Relationship”. You’ll be presented with two standard options “Parent Company” and “Subsidiary”. You can add more values to this list if you wish from the configuration landing page as described here.
If you are creating a relationship between two Own Organisations, you’ll need to ensure that you have permission to access both records. Your System Administrator can arrange this for you and more information is available here on how to achieve this.
Removing Own Organisation Relationships
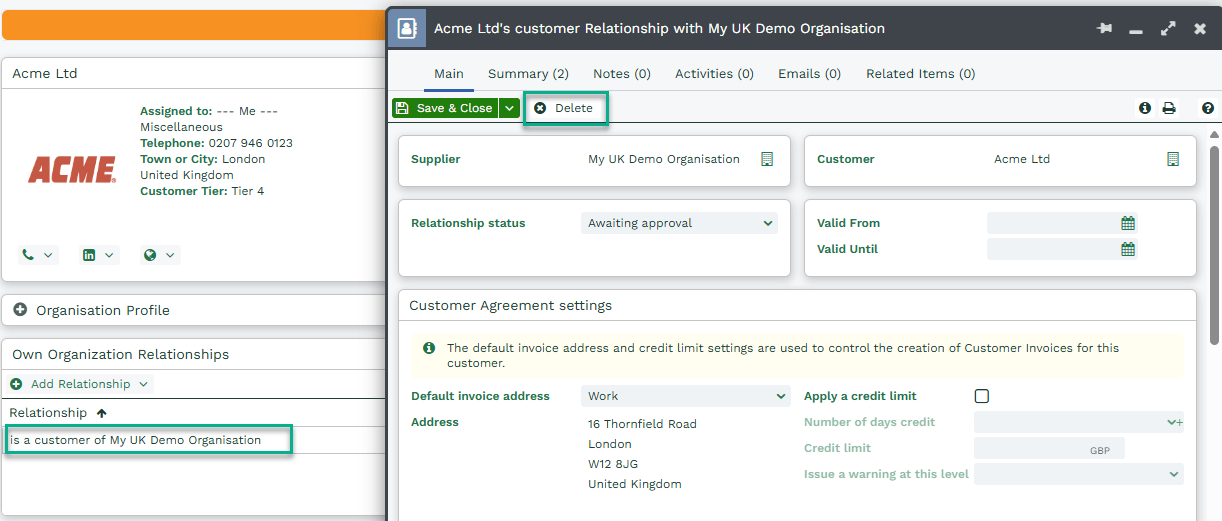
It is not possible to delete a Customer / Supplier relationship if you have Transaction Documents on which the Person / Organisation is the Customer / Supplier.
If your System Administrator has configured your database to use the grid view of Party Relationships, you’ll need to click on the relationship to open it, then click “Delete“.
If you are using the Checkbox view, click on the relevant link underneath the checkboxes to open the relationship. Then click “Delete“.
