








Managing a Project
My Collaborations
The ‘My Collaborations’ view shows all Projects where you’re listed as a member. This is different from My Projects, which only shows Projects that are assigned to you.
The rest of this article will explain what you’ll find within the Project record.
Main tab
The Main tab contains the key information for your Project, including details such as Name and Description. As well as other important Project information such as, Status, Start/End dates, Project Health, Budget etc.
You can use this tab to view and update the core settings and information for the Project.
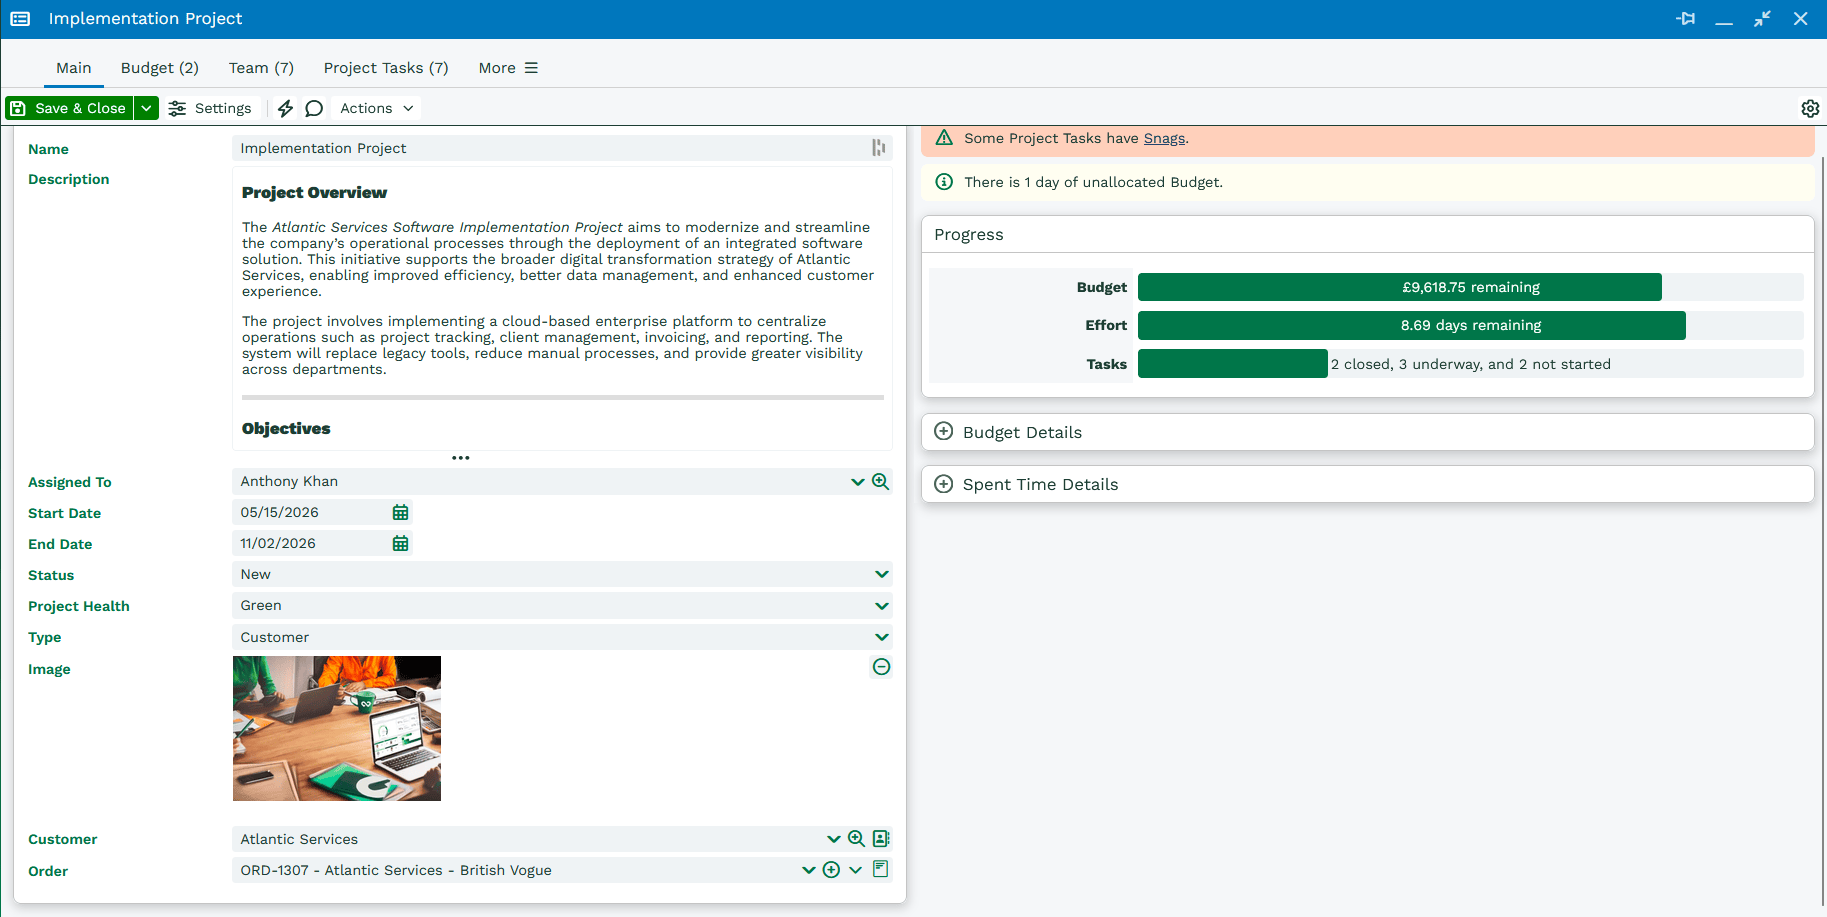
On the left-hand side, you’ll see the details entered when the Project was created. The sections on the right provide additional information to help you track the progress of your Project.
The Progress section gives an overview of your budget, effort, and the status of your Project Tasks.
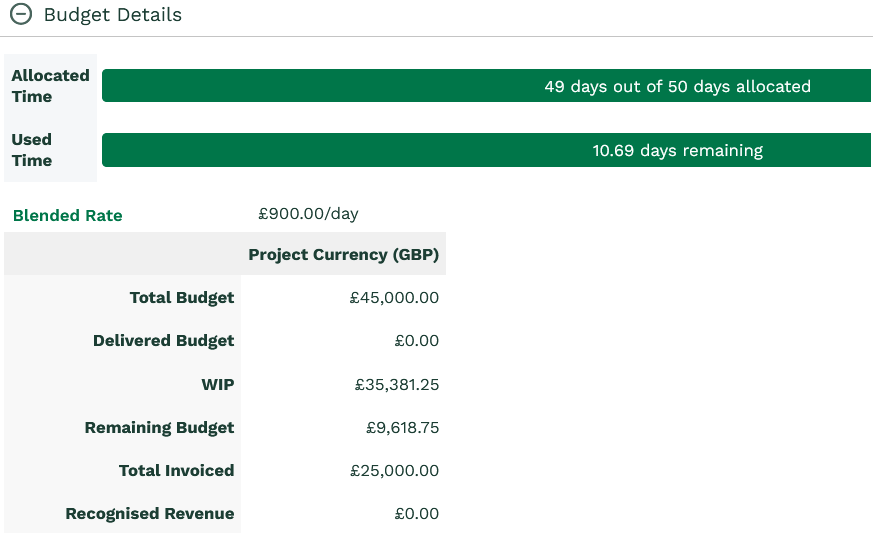
Expand ‘Budget Details’ to see allocated and used time, along with a breakdown of project costs.
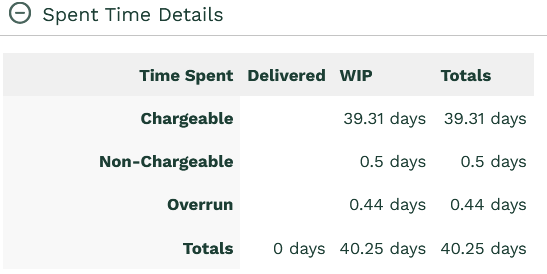
Expanding ‘Spent Time Details’ shows how time has been recorded against the Project so far.
Budget
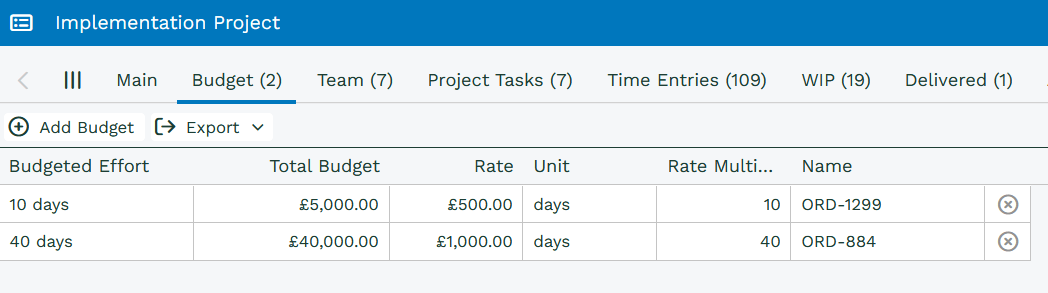
The Budget tab gives you a detailed view of the time and costs associated with your Project. Use it to track budgeted versus actual values, monitor spending, and see how resources are being used throughout the life of the Project.
Team tab
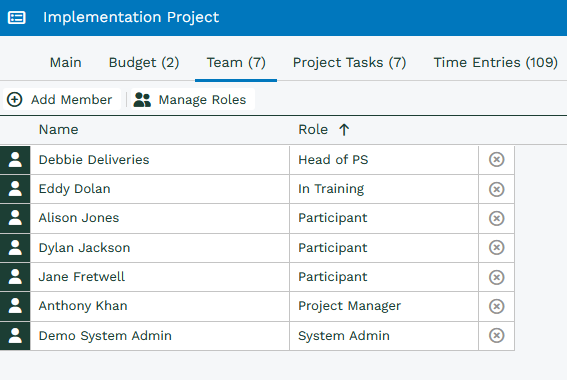
The Team tab shows everyone involved in the Project and the role they play. Use this tab to view Project members, add new team members, and manage responsibilities to make sure the right people have access to the Project.
Project Tasks
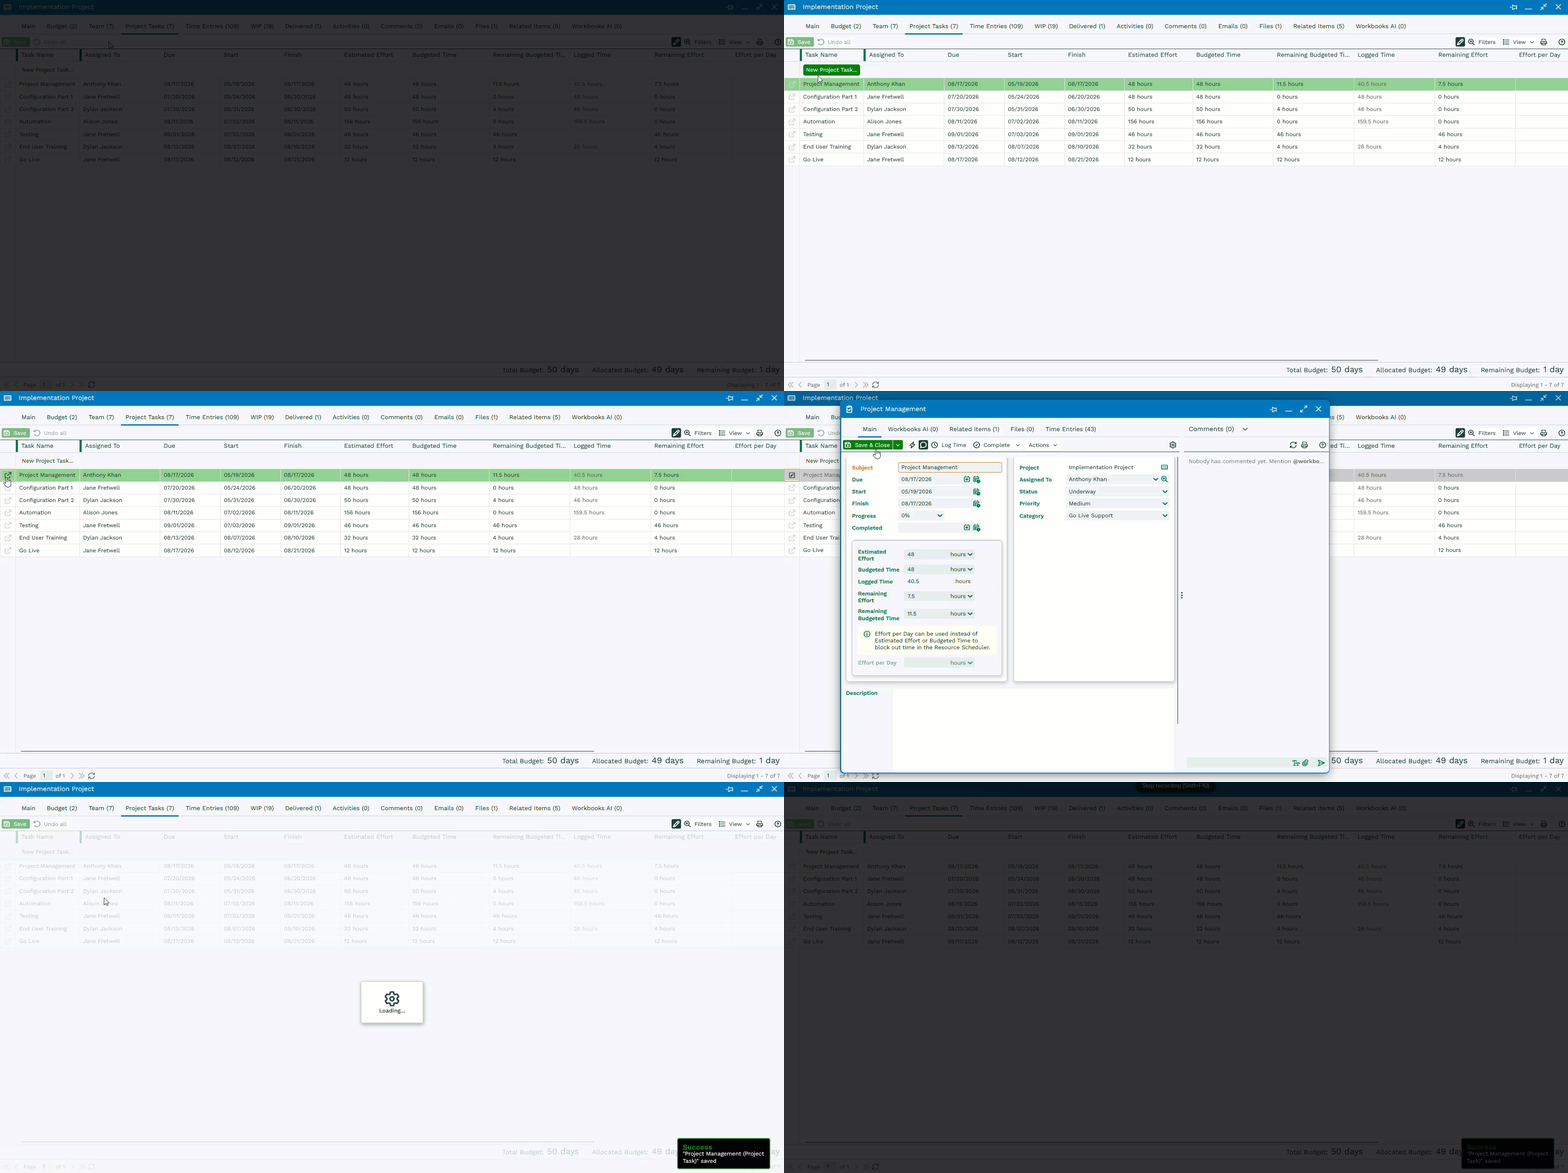
The Project Tasks tab displays all Tasks associated with the Project. From here, you can open individual Tasks to view details, update information, track progress, and make any required changes.
You can also make changes directly from Grid View. Select the Grid View icon, then click the relevant cell to edit its value without opening the Task record.
Logging Time
As team members work on Project Tasks, they can record the time they’ve spent by opening the Task and selecting Log Time. This helps keep Project progress, effort, and budget information up to date.
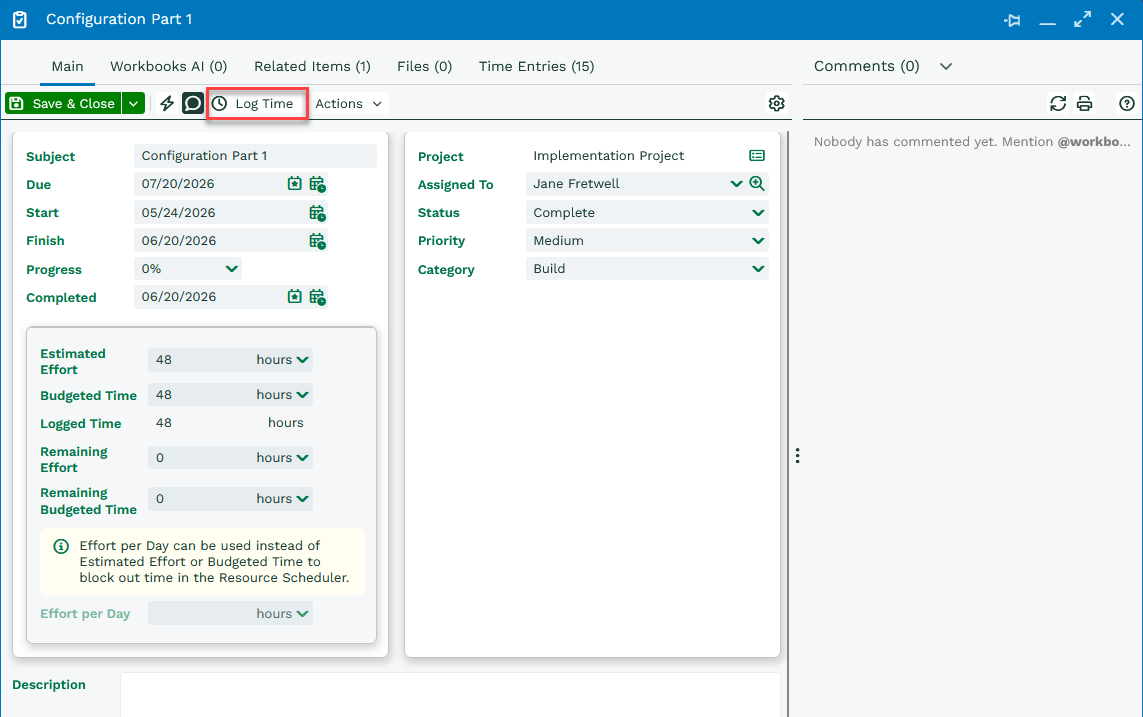
Clicking Log Time opens a window where time can be recorded against the Task for specific dates.
Project Managers can log time on behalf of any team member assigned to the Project. Depending on your role permissions, you may also be able to log time for other users. Team members without these permissions can only log their own time.
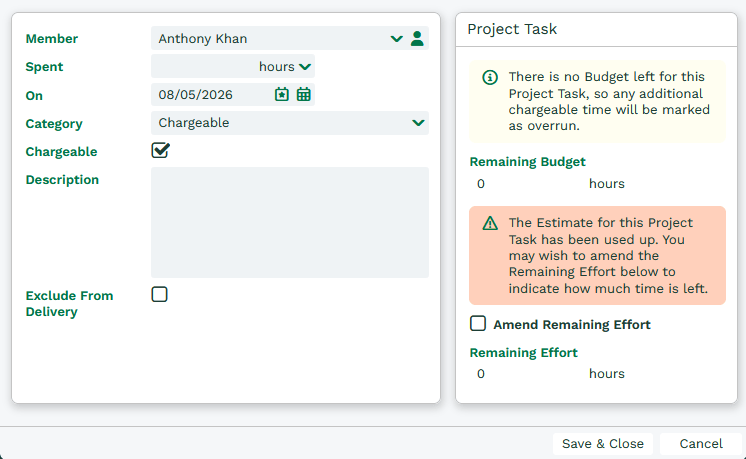
In the Log Time window, select the date you’re recording time for, which defaults to today’s date, and enter the amount of time spent. The time units shown are based on your system settings, but can be changed if needed.
You can also choose a Category. The available categories match those set up for the Project, and the Chargeable checkbox is automatically selected based on the chosen category.
Use Exclude From Delivery if you want to record the time but temporarily exclude it from delivery calculations.
When the Project uses a Rate and Time budget, you’ll see a Project Task panel on the right. This displays the remaining budget and effort for the Task. These values update automatically as you enter time in the Spent field.
If the time entered exceeds the remaining budget, you’ll see a warning that the additional time will be recorded as an Overrun.
If you’re logging time against a Task with no allocated budget, how the time is recorded depends on the Project’s budget type:
- Time Only: logged as non-chargeable time
- Price Only or Rate Only: logged as chargeable time
- Rate and Time: logged as an overrun if no budget remains
Time Entries
The Time Entries tab shows all time logged against the Project, grouped by Task. This makes it easy to see where time has been spent and whether entries have been recorded as Chargeable, Non-Chargeable, or Overrun. Overrun entries are highlighted in yellow for quick identification.
You can also see the status of each time entry, including whether it has been Approved, Delivered, or marked as Excluded from Delivery.
Note
Once a Time Entry has been marked as Delivered, it can no longer be deleted.
Recalculating Overrun
If a Project Task has time recorded as Overrun, you can increase the Budgeted Time, provided additional budget is available.
When you update the budget, you’ll be asked whether you want to recalculate any non-approved Time Entries. This allows existing overrun time to be reassessed against the updated budget and effort available.

Adjustments
If you need to change time entries from Chargeable to Non-Chargeable, or vice versa, you can update individual Time Entries. However, if multiple entries need to be changed, it’s often quicker to create an Adjustment.
Adjustments let you select a Task, Team Member, and date range, then move time between Chargeable, Non-Chargeable, and Overrun categories in a single action.
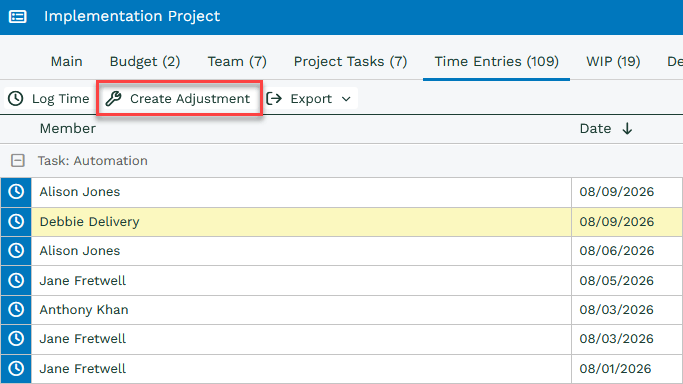
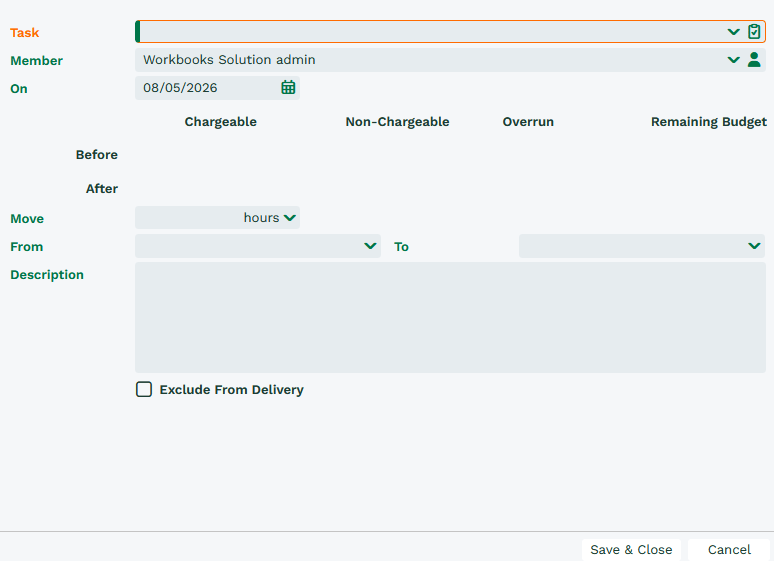
You can add a description to explain the reason for the adjustment. Once saved, the Project budget is recalculated to reflect the updated time allocation.
Each adjustment creates a new Time Entry, providing a clear audit trail of the change. For example, if 2 hours are moved from Chargeable to Non-Chargeable, an additional Time Entry will be created to show that adjustment.
WIP
The WIP (Work in Progress) tab provides a summary of chargeable time that is ready to be billed. Time is broken down by Task and team member, making it easy to see where effort is being spent.
You can use this information to review the revenue generated by individual team members or specific Project Tasks. If team members have different billing rates, the values are calculated automatically.
The WIP tab also helps you identify any Overrun time that has been recorded against the Project.
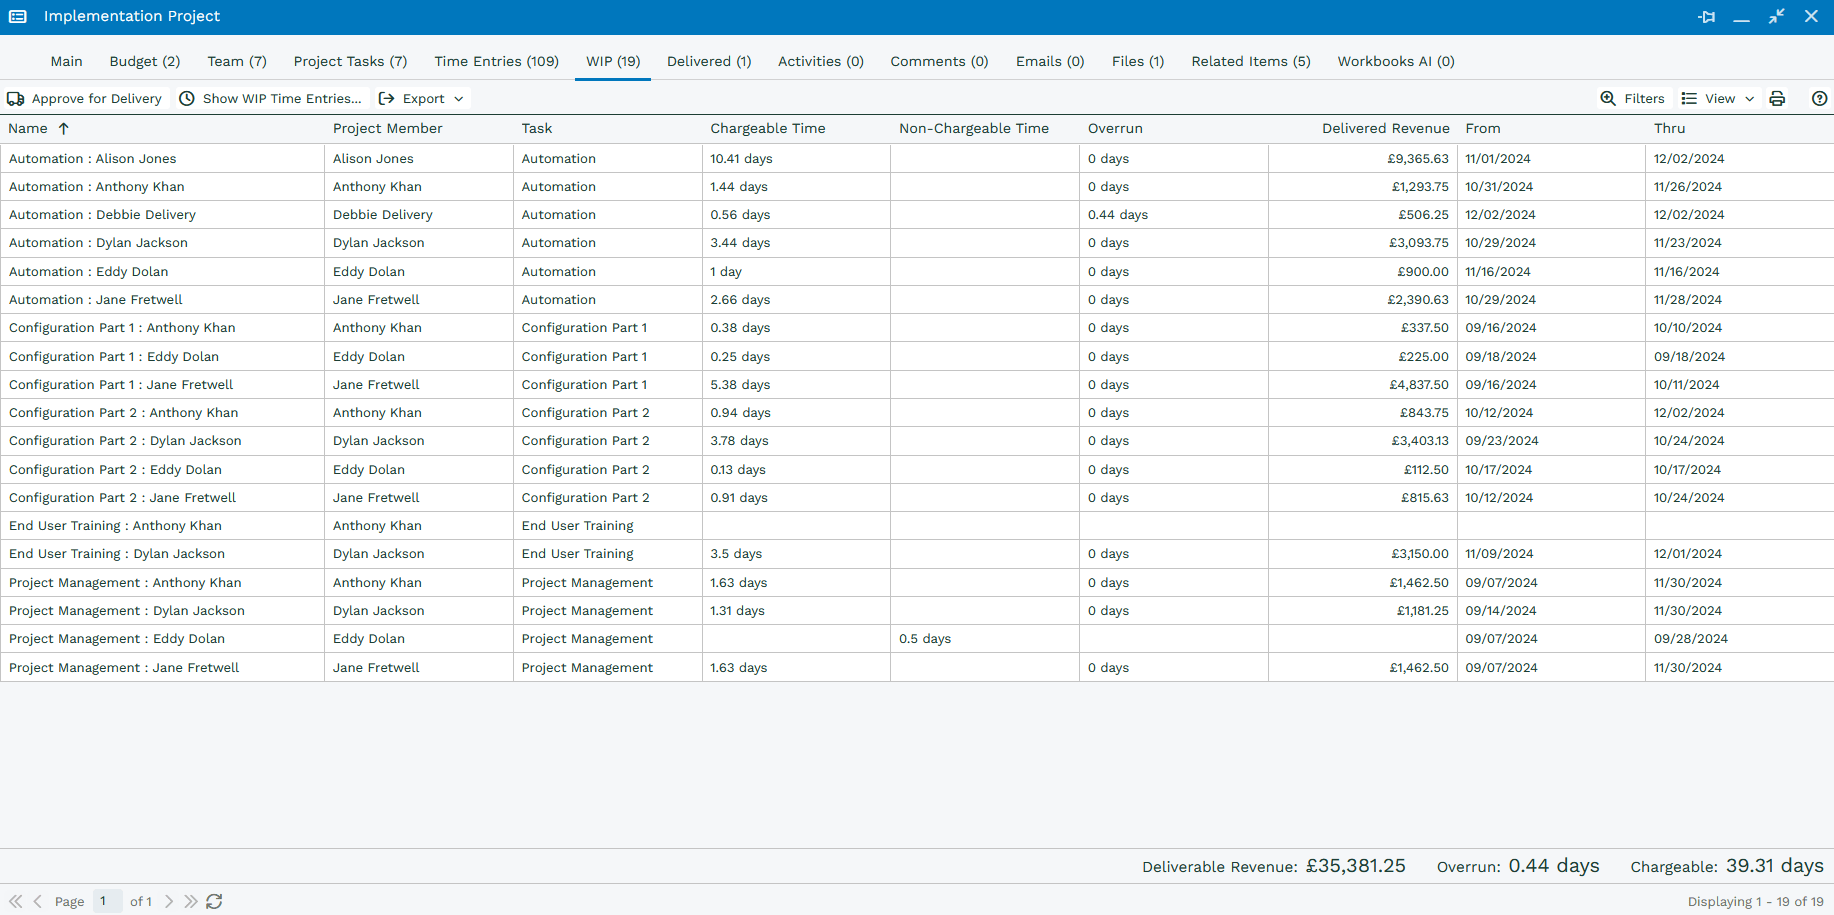
At the bottom of the WIP tab, you’ll see the total Chargeable Time and Deliverable Revenue for the Project. If your Project uses a Rate Only budget, Chargeable Time won’t be displayed.
From this tab, you can select Approve for Delivery to move time entries from Work in Progress (WIP) to Delivered.
The WIP view provides a summary of logged time. If you need more detail, select Show WIP Time Entries. This opens the Time Entries tab and automatically filters the results to display the relevant entries, grouped by Task.
As time is logged, approved, delivered, or adjusted, the summary information shown on the right-hand side of the Main tab updates automatically to reflect the latest Project status.
Timesheets
You can also access Timesheets from Start > Projects.
Timesheets provide a simple way to record and review time across multiple Project Tasks. They allow team members to enter time worked without needing to open each individual Task, making it quicker to keep Project time records up to date.
This allows a user to log time against multiple tasks in one go rather than going into each task. When you open Timesheets, you will see all Tasks that you are scheduled to work on for that week. New Rows can be added if you have worked on something you are not scheduled to work on. If you are adding both Chargeable and Non-Chargeable time then multiple rows would need to be added.

To log time, simply click the relevant cell for the Task and day, then enter the time spent.
You can also add a description to a Time Entry by selecting the speech bubble icon next to the time entry field. This is useful for recording details about the work completed.
Note
The Timesheets option will appear in the menu once the first Project has been created in your database.
Snags
Snags are issues or risks that could impact your Project. You can view and manage open Snags from the Main tab, helping you keep track of anything that may affect project delivery.
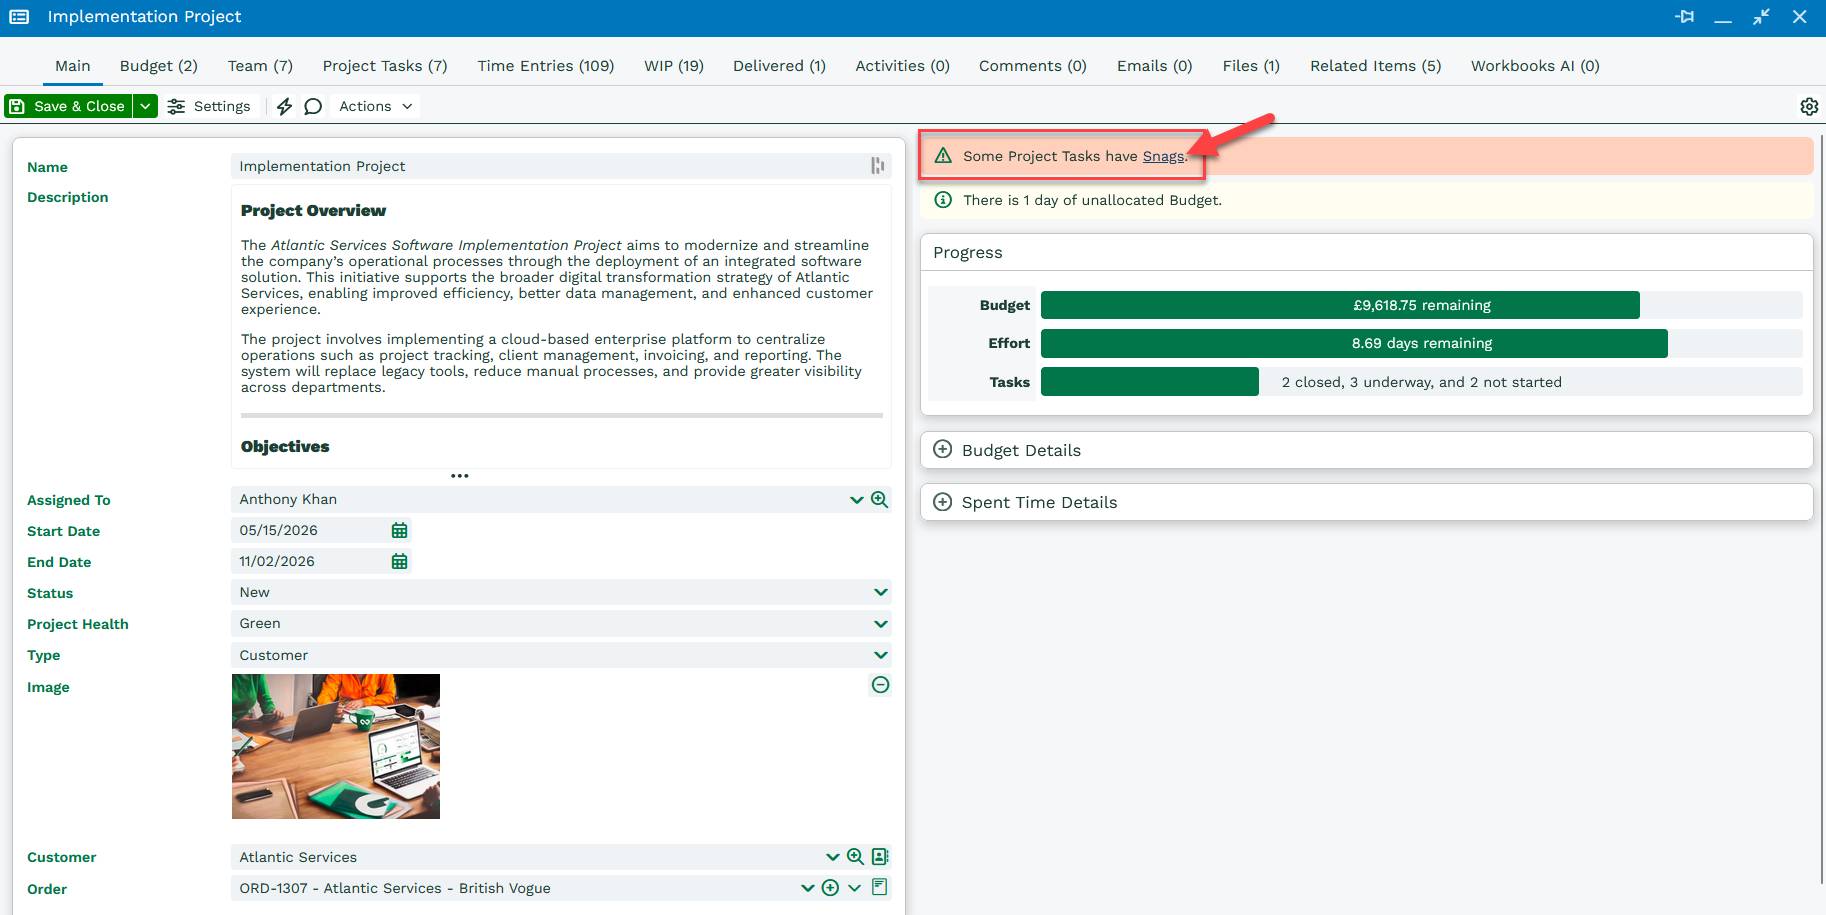
Snags highlight issues that may affect the progress of a Project, such as delayed work or Tasks taking longer than expected.
Potential Snags include:
- Overdue: The Task is still open and the due date has passed
- No estimated effort: No estimated effort has been entered for the Task
- Delayed start: The scheduled start date has passed, but the Task hasn’t been started
- Not scheduled: No start date has been set for the Task