


Target Sets
Introduction
Target Sets are independent records where you can assign general or time period specific targets for Users which can then be applied to any report using the Targets tab on summarised columns. The key difference between general and time period targets is that the latter are based on Calendar or Accounting Periods while general targets are not. For example, you could set a revenue target of £10,000 per quarter to one of your sales team, but a general target number of closed Cases for your support staff.
By creating a Target Set you are able to apply the same target values to a number of reports, reducing the time and effort you otherwise would have spent manually entering the targets into each report. Target Sets can also be updated and changed as necessary and have these changes reflected onto any reports using them.
How it works
There are two ways to create Target Sets:
-
Create them manually via the Targets Landing Page
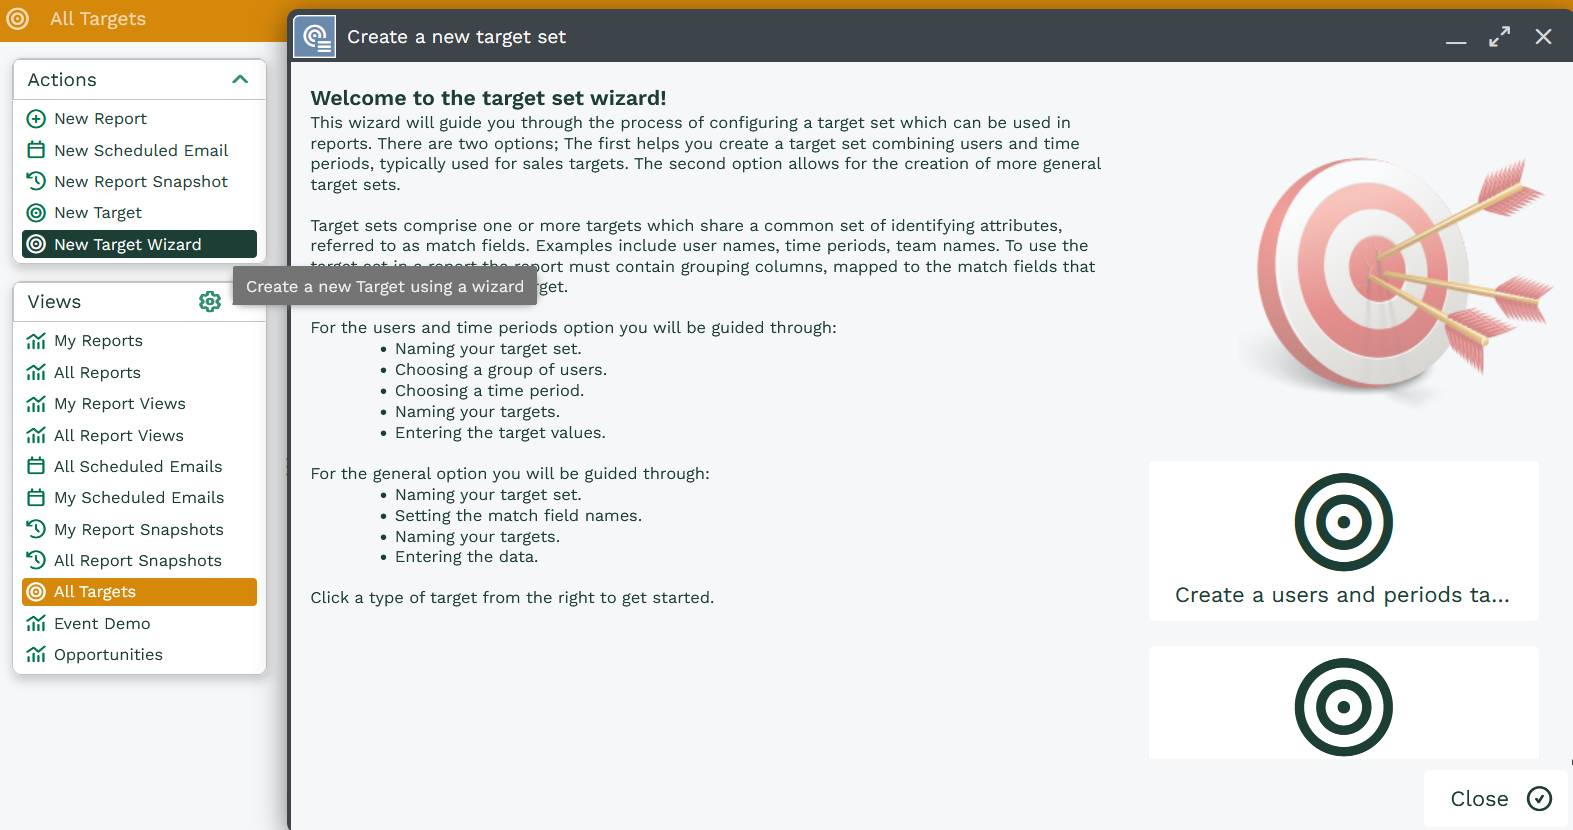
Target Sets can be created by going to Start > Reporting > All Targets, and either creating them manually or via the Target Wizard. The Wizard will walk you through each step in detail; this is recommended for the first time Targets are created.
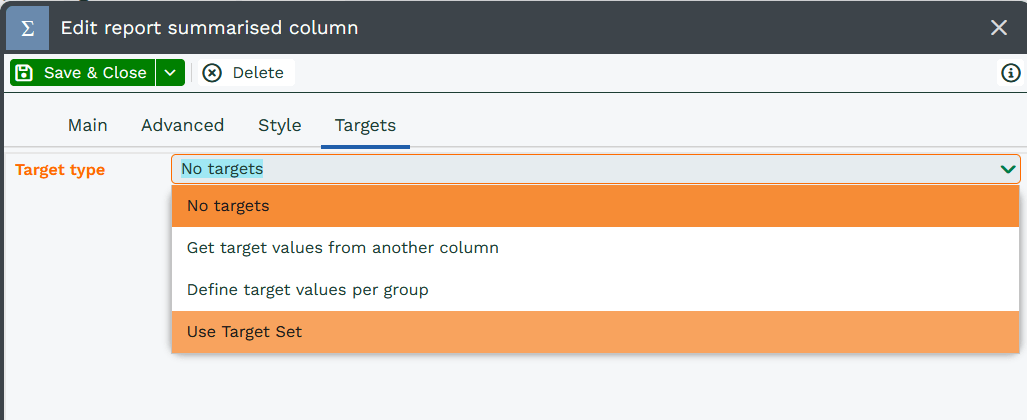
Once a Target Set has been created, you can apply it to a report by going onto the desired summary view, clicking on a summarised column and navigating to the Targets tab. Here you select ‘Use Target Set’ from the Target Type picklist, and a number of fields will appear that will allow you to specify which column you want the targets to relate to (e.g. your financial targets may be for each Sales Representative, or you may have a target number of Leads generated per Marketing Campaign).
After configuring these fields as desired, Save & Close the window and refresh your report preview/run the report.
-
Create a Target Set from existing targets on a Report
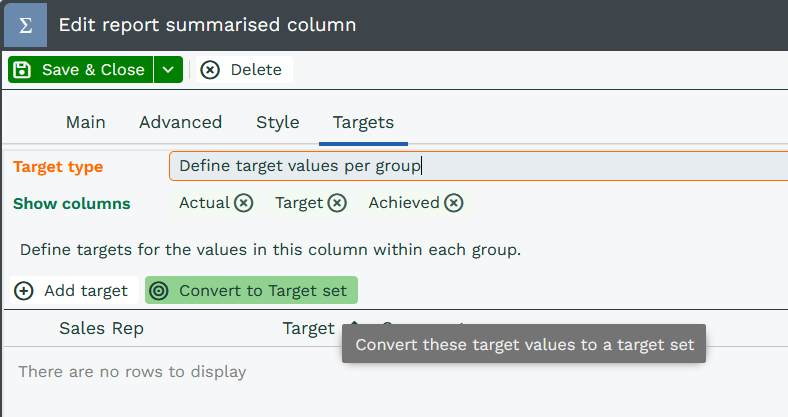
If you have already set up Targets within a Report without using a Target Set, you can convert those into a Target Set, making them more reusable and easier to amend in future. To do this, navigate to the Report Summary tab and open the column that has the targets already applied, and on the Target tab click ‘Convert to Target set‘. This will open the new Target Set, and on the Target Values tab you will see all of the existing values have been populated automatically.
You will then need to change the Target type used on the Report column to point to this Target Set.
Using Target Sets in Reports
Adding Target Sets
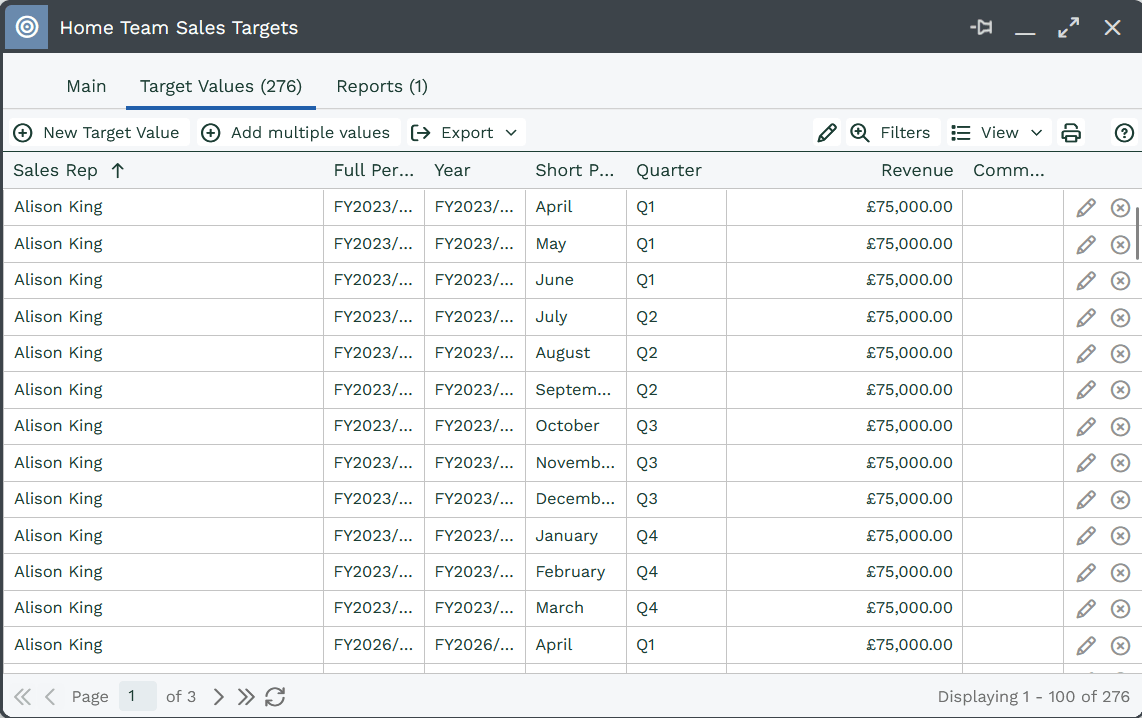
Once you have created a Target Set, you will be presented with your final Target record as shown below. Think of the Match Fields as a list of potential columns in a report that you could use to match against your Targets. You will need to ensure that you have at least one column in your report that can be used to match against one of these fields (e.g. Sales Executive could be matched against the Assigned To column).
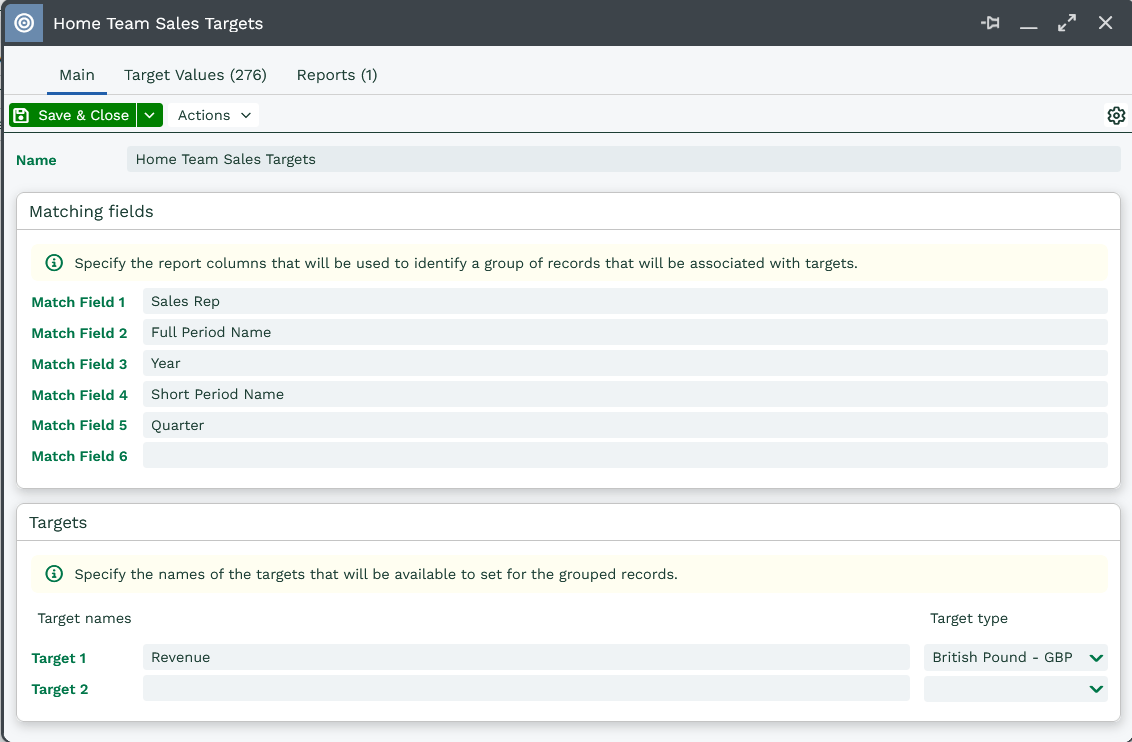
Open your Report and go to the Summary tab that contains the column you want to apply the Target Set to. Make sure to add any necessary columns that you would like to use as Match Fields.
NOTE: In order for a column to be used as a Match Field, it must be set as a Grouping Column.
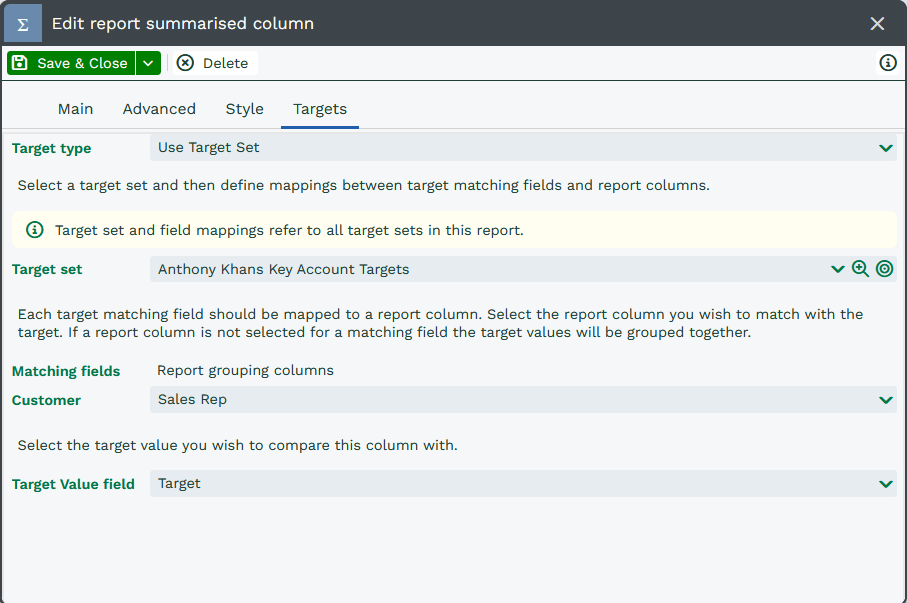
Click on the column you want to apply the Target Set to and navigate to the Targets tab. In the ‘Target Type’ dropdown menu, select ‘Use Target Set’ – this will reveal a number of fields. Select your Target Set from the next dropdown menu, and review your available Match Fields.
Within the Match Fields section, select which columns from your Report Summary will match up with the relevant values from your Target Set. You do not need to pair up all Match Fields, just the ones you need, as you can see below. Lastly, choose the actual Target Value you want to be compared against the value of the column you’re applying it to.
Using criteria with Target Sets
On a Summary view that contains a column using a Target Set, navigate to the Criteria tab and click the ‘Target Set Criteria’ button. Using only target set criteria will ensure that all target set records are shown in a report, including those without source details.
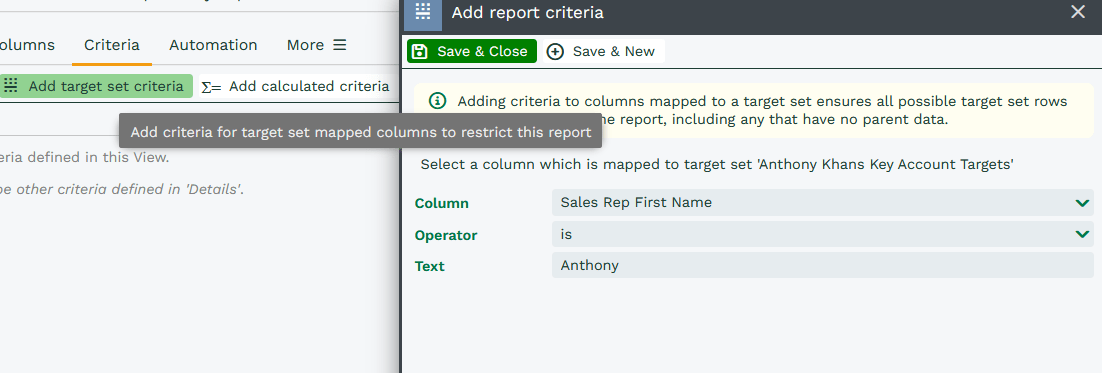
NOTE: Only columns that are included in the Target Set as Match Fields will appear in the dropdown menu in the Criteria window.
Worked examples
- Creating a Target set for Closed Sales amount per Sales Person by quarter (includes template of example data)
- Creating a Target set for Closed Cases per Customer Support Agent