


Using the Mapping Module
How to use the Mapping Module, including what each of the icons mean, using within Reports or Landing Pages and switching between viewing as a Map/List.
Tip
There is a helpful video that demonstrates the Mapping functionality on the Introduction page.
Using the Mapping Module
Once a User has been allocated a Mapping licence, they will see a ‘Map position’ column on People and Organisation Landing Pages. This will show a map pin if Workbooks has found a valid address for the address on that record: the lack of a map pin suggests there is no address for the record, or there may be an error in the address. The map position will only appear for the main location recorded on that record i.e. not the Home location or any additional addresses added.
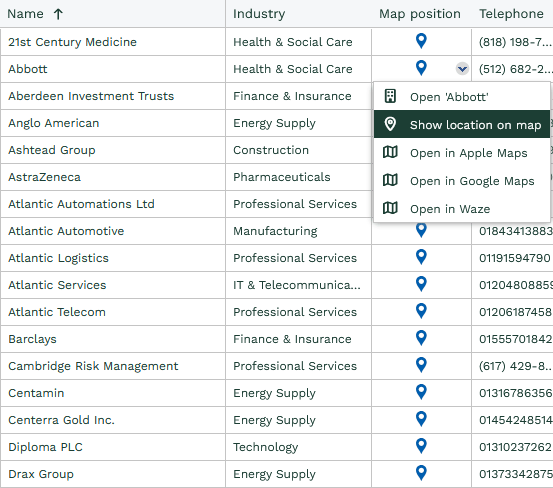
By right clicking in the Map position column on a Landing Page, a context menu will open, allowing you to select to view that location on a map.
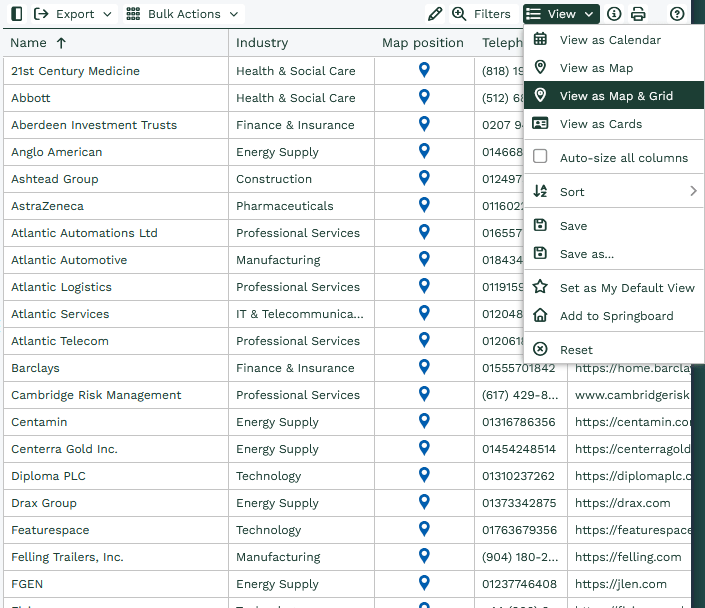
Any Landing Page or Report with this Map position column available will have the option to ‘View as Map’ or ‘View as Map & Grid’. This will then plot the first 1,000 records on a map.

NOTE: Changing the order of the results e.g. via sorting will change which records are plotted on the map. Sorting by the Map Location column will order the Results by their latitude coordinates, so you may see results primarily at the top or bottom of your search area.
Clicking on one of the mapped pins in a landing page will show you:
- The Name of the Person or Organisation – clicking on this will open up that record.
- The ‘main’ address of the record it corresponds to.
- An option to ‘View in Google Maps’.
NOTE: You have greater flexibility over what appears when you click on a map pin within reports – further information about this can be found in the Reporting on Mapping section below.
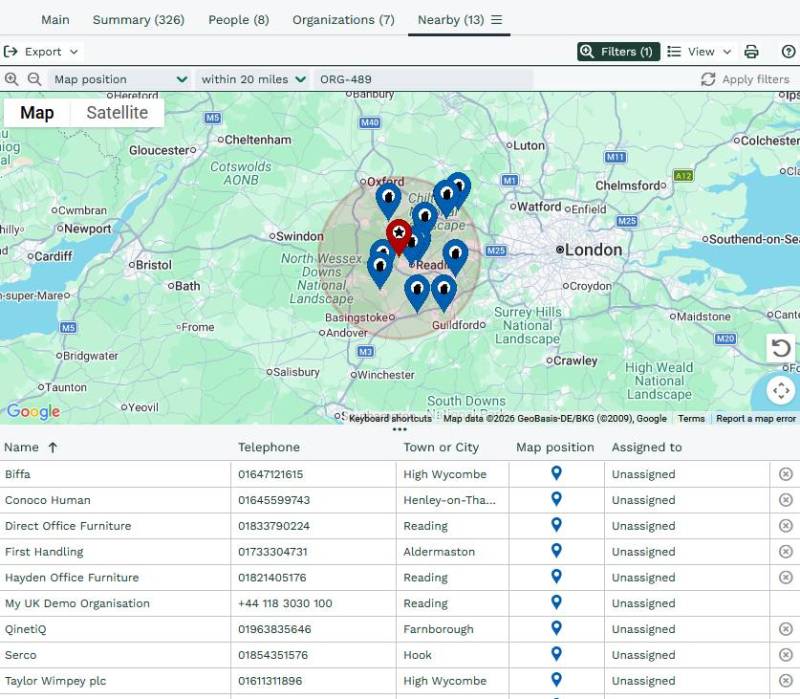
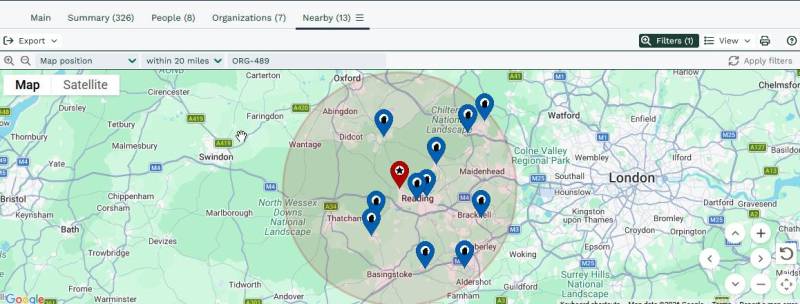
It is possible to apply filters to the Map Position, asking for those within a set number of miles or km of a location. A red pin will be put in place for the location set in the conditions of your filter; in the below example the red pin points to ORG-489.
You can filter the Map Position by entering:
- A postcode.
- The Object Reference of a record in your database – for Organisations, People and Leads as they are the only records with a location.
- An arbitrary value like Reading or Hampshire. – It will choose the centre point of that location and search out from there.
Additionally, you can filter based on the accuracy of the position by using the Map Position Rank column. The Rank is a number from 0 to 31, where the higher the number, the more accurate the map position is. We also represent the varying ranks by placing an icon within the pin on the map, as per below.
![]()
Represents locations which could only be mapped to large geographical areas such as County, State or Country level. These pins have a map position rank between 1 to 12
![]()
Represents locations which could be mapped to an area which is between city-size and suburb. These pins will have a map position rank between 13 to 20.
![]()
Represents locations which could be mapped to a neighbourhood or a specific location. These pins will have a map position rank between 21 to 31.
If filtering by the Object reference, it will show the name of the record and the object reference as well as the address. Clicking on the red pin will show you its location in different ways depending on how the map position filter has been applied. For example:
- If filtering by a name of a place, it will show the matched name so you can determine if that is a relevant match – i.e. if you type in ‘Botley’ you’ll get ‘Botley, Buckinghamshire, South East, England, UK’ back but you may have wanted ‘Botley, Oxford’ or ‘Botley, Hampshire’ instead.
If your search results in a match to multiple possible locations, Workbooks will choose one of these, but if it is not the correct one, you just need to narrow your search down further by adding more keywords to the location. If is unable to find a relevant location, it will return no results.
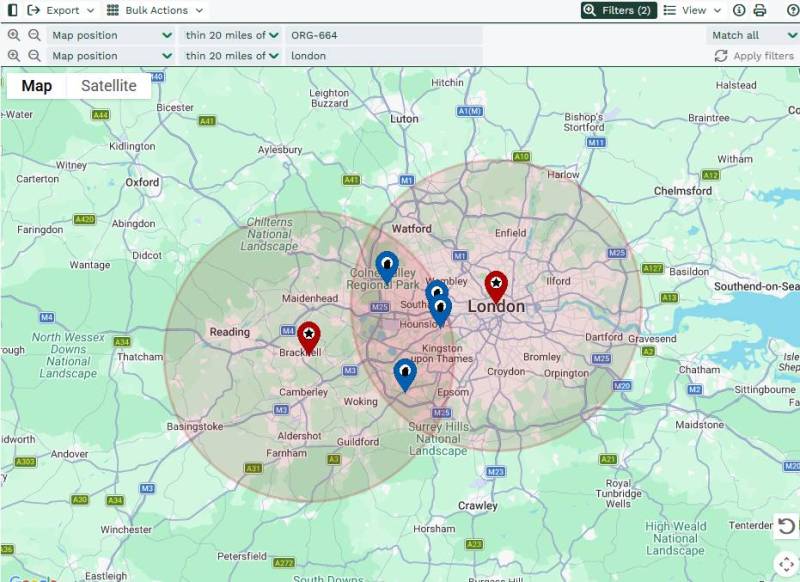
It is possible to apply multiple Map Position filters, using the ‘Match all filter condition’ or ‘Match any filter conditions’. For example, if you use ‘Match all filter conditions’, you can find all Organisations within 20 miles of your Own Organisation and within 20 miles of London:
Or you can use ‘Match any filter conditions’ to find all of the Organisations within 20 miles of your Own Organisation or within 20 miles of London:

While the additional addresses for a record cannot be displayed within Landing pages or Reports, you can see these as pins on a map within the Contact Details tab on the record. The Map Position will get recalculated whenever an address gets updated.
Organisation Records will automatically have a ‘Nearby’ tab, which will by default show all Organisations within 20 miles of that Organisation. These filters can be amended, e.g. to show only the Organisations that are customers.
NOTE: If no valid address is available for the record, then an error will be shown beneath the selected filters.
Map Position Status
A Map Position field will be available on Organisation, People and Lead records. The field is read only and it will show one of the following pieces of information:
- The latitude and longitude of the location (if an address had been found)
- The status of the mapping (e.g. ‘Being mapped…’, ‘user-specified’)
- If there was an error mapping (e.g. ‘Address incomplete’ or ‘Address not found’)
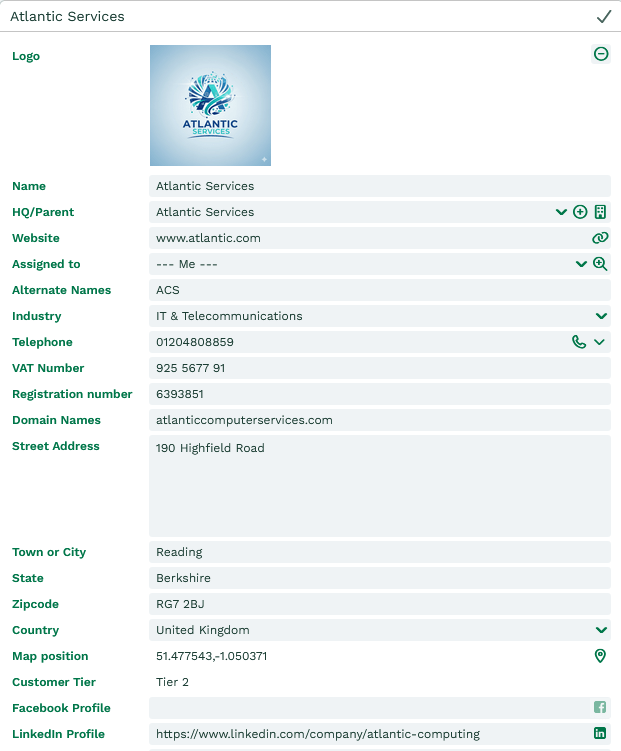
Clicking on the blue pin on the left of this field will show you a map with the current mapped location.

You can then right-click on the map to move the pin to a new location or choose to move the pin back to the last saved location. Manually moving the pin to a new location will update the Rank to ’31’ and set the Map Position to a status of User defined.

Remember to save the record after you have amended the map position if you want the new position to be saved. If you want to revert back to the default position found by Workbooks rather than the last saved, you should make a change to the address so it recognises it as a new address and it will then re-map after saving it.
NOTE: If you use form layouts then the field may not appear automatically. You may need to open and save the form layout within Configuration, and in some cases move the field to the correct position on the form layout.
Reporting on Map position
It is possible to add the Map position column to reports, and once you have done so, you will have the option to view the results of the report on a map. For example, you could build an open Opportunity report containing the address and map location of the prospective customer. Find out more about reporting on Map Position here.
These reports can be added to tabs on records, or as a report/ report cell on the Main tab. These can be constrained as normal, for example, by the Object Reference or Id of the record.