


Dotdigital
Workbooks offers seamless integration with Dotdigital, a leading cloud-based email marketing platform. This allows you to effortlessly sync contacts and activities, including online activity types, from Dotdigital into Workbooks.
Key engagement data such as email bounces, opens, click-throughs, form submissions, and page views from Dotdigital will sync back into Workbooks, providing you with a comprehensive view of how your audience interacts with your emails.
Proxy Mailshots will be created in Workbooks as copies of your Dotdigital campaigns, ensuring that online activities for email interactions are linked to the relevant Mailshots.
While Workbooks serves as the primary source for your data, the integration ensures that preferences, opt-outs, and undeliverable flags sync both ways. This keeps your contact information accurate and up-to-date, saving you time and helping you manage customer relationships effectively
The sections covered in this article are:
Pre-requisites
The Dotdigital module can be accessed by going to Start > Configuration > Account Settings > Licenses&Modules > Modules and check there’s a tick in the checkbox to Dotdigital Integration.
There are several capabilities which allow a user to configure the integration in Workbooks which are:
- Manage Dotdigital configuration
- View Dotdigital configuration
Dotdigital Configuration Guide
In Dotdigital
1. Log in to Dotdigital with your normal login Credentials.
2. Expand the User menu in the bottom left and go to Settings > Access > API users.

3. Select NEW USER

4. The username (email address) is automatically generated for you and must not be edited. You can add a description to differentiate between API users, which is useful if you have more than one.
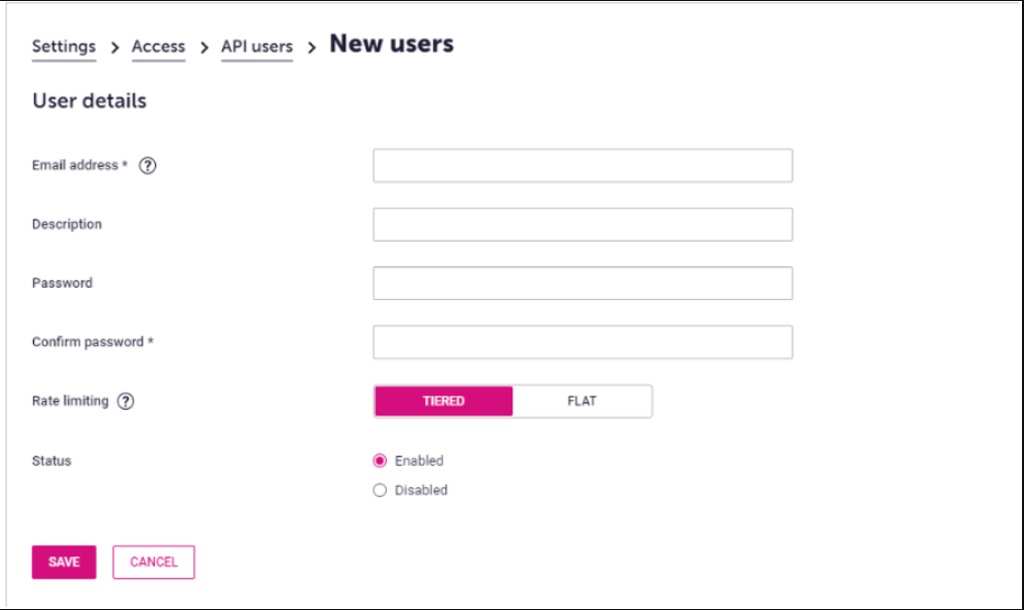
5. Enter a password and confirm it.Your password must be atleast eight characters in length one digit or non-alphanumeric character.
6. For Status, select Enabled
7. Select SAVE.
In Workbooks
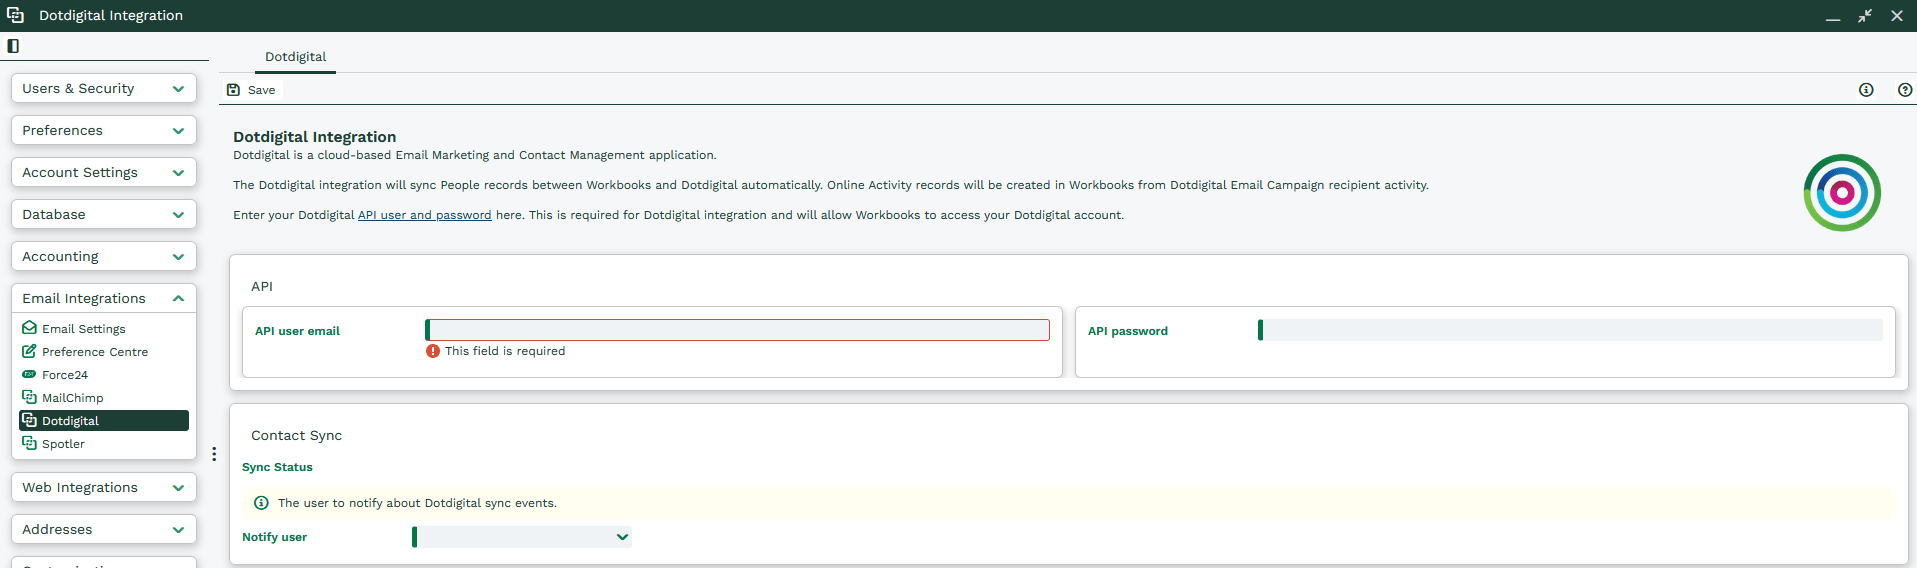
1. Navigate to Start > Configuration > Email Integration > Dotdigital
2. Add the API user email and API password
3. Save
If successful, you will see the following screen, the screen displays information on the account credentials used, the number of API calls in the last hour and how many you have remaining.
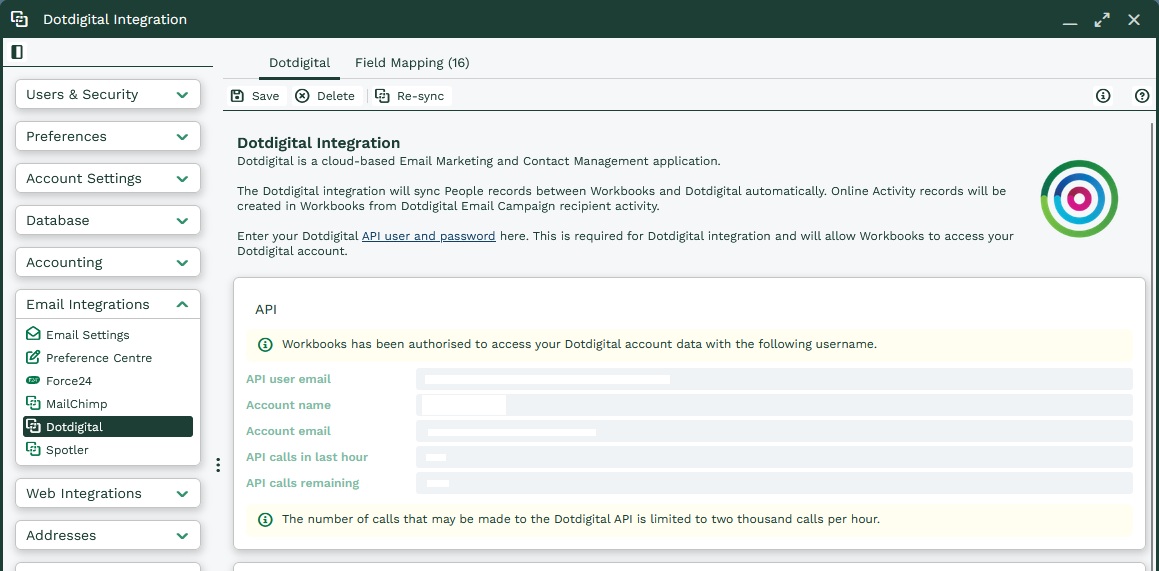
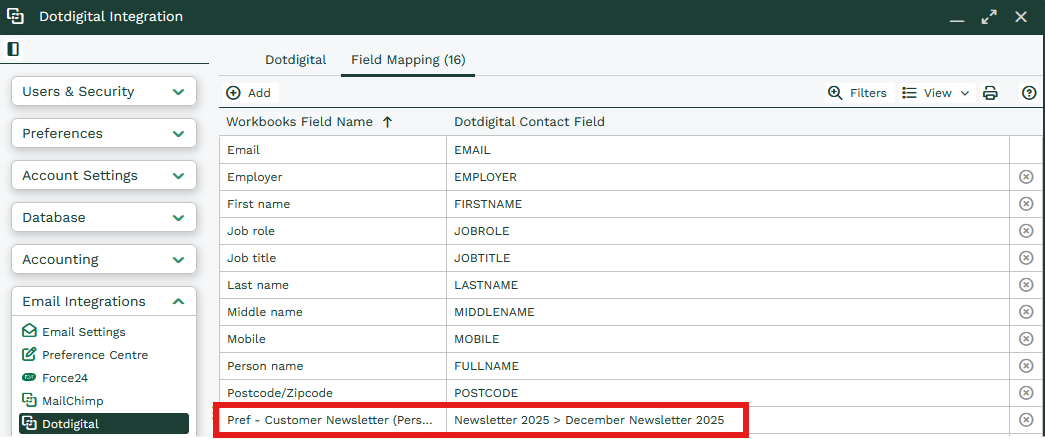
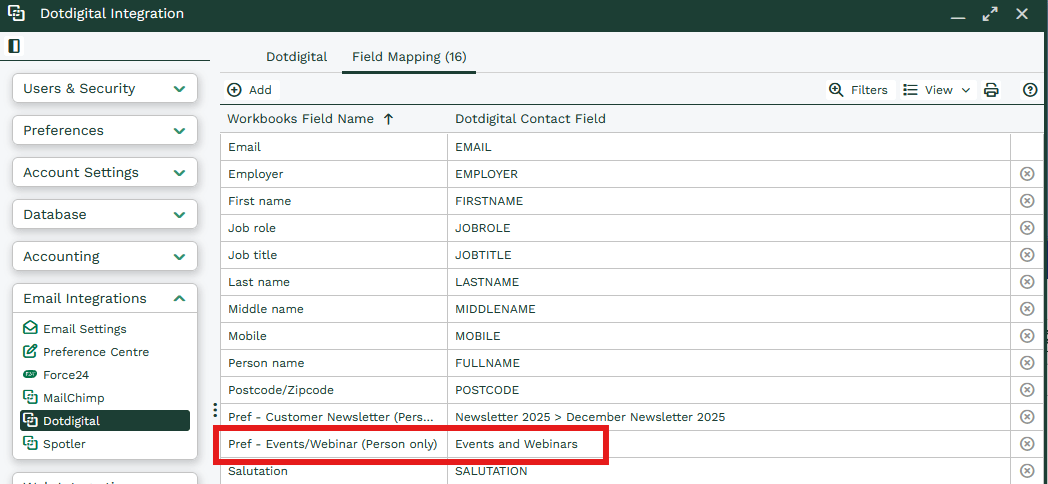
Field Mapping tab will then be available, displaying the standard Field mappings. You can also add additional mappings if needed.
Field Mappings & Marketing Preference Mapping
Both Standard Field and Preference mapping are done within the same section.
Field Mappings
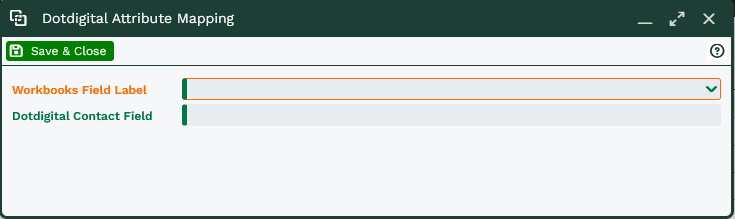
The Workbooks Field Name field provides a picklist of available fields from Person records in Workbooks.
Select the appropriate Workbooks field, then enter the corresponding Dotdigital field name. As this field is free text, it is essential to enter the name exactly as it appears in Dotdigital to ensure accurate data synchronization between the two systems.
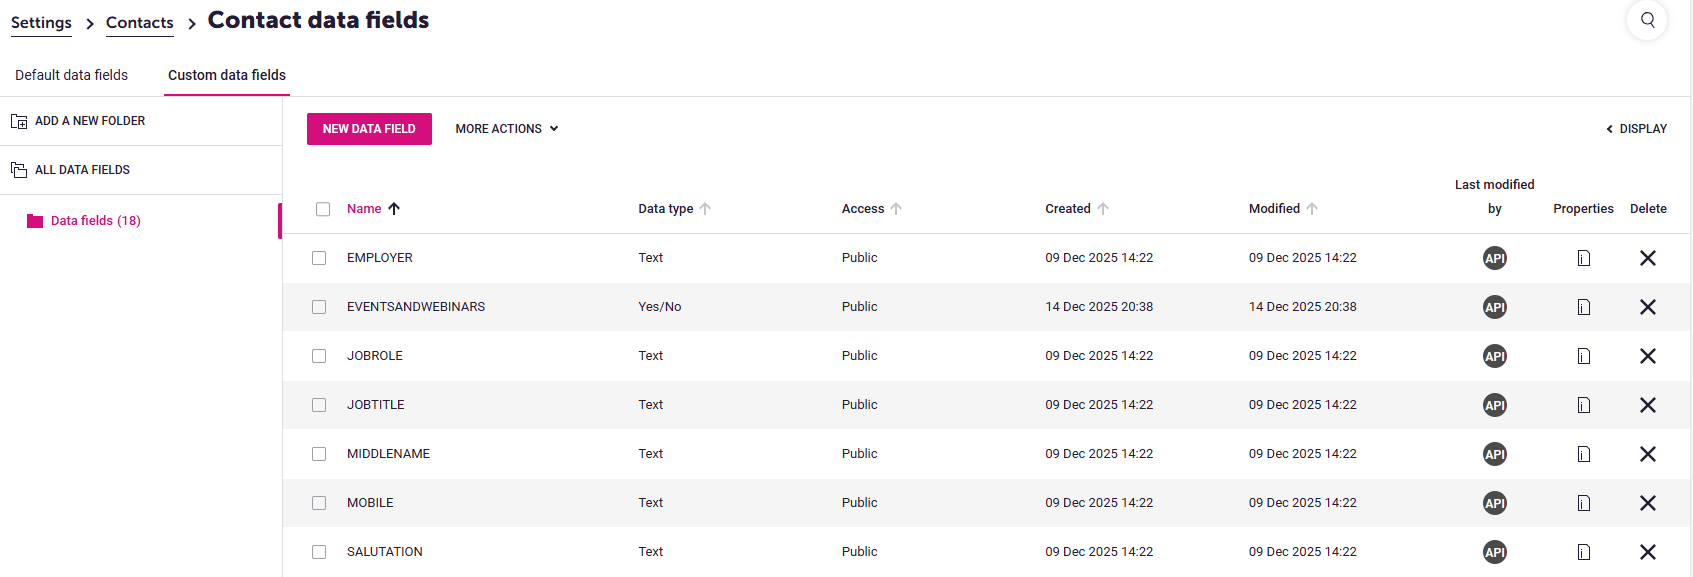
To add a data field in Dotdigital, go to Settings → Contacts → Contact Data Fields. Here, you’ll see two tabs: Default Data Fields and Custom Data Fields.
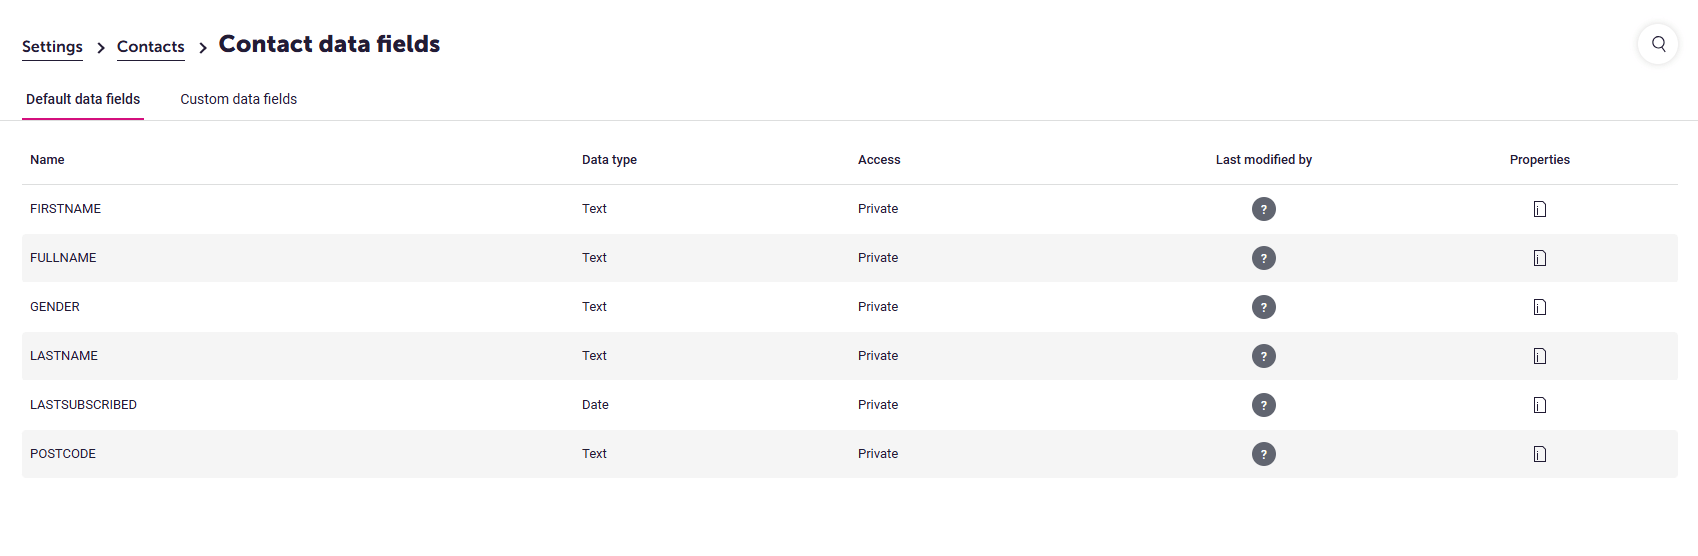
To add a new Custom Data field, simple press the ‘New Data Field’
For information on creating Workbooks Custom Fields, see (Creating Custom Fields | Workbooks CRM Support)
For information on how to create Dotdigital Custom fields, see (Create, delete, and edit custom data fields | Dotdigital Help Centre)
Marketing Preferences
Creating Marketing Preferences in Dotdigital
To create a Marketing Preference in Dotdigital, go to:
Settings → Contacts →Marketing Preferences → New Preference or Category
You can either:
- Create a Category and add one or more preferences under it, or
- Create a standalone preference without category
Examples
-
Category: Newsletter 2025 → Preference: December Newsletter 2025
- Standalone preference: Events and Webinars
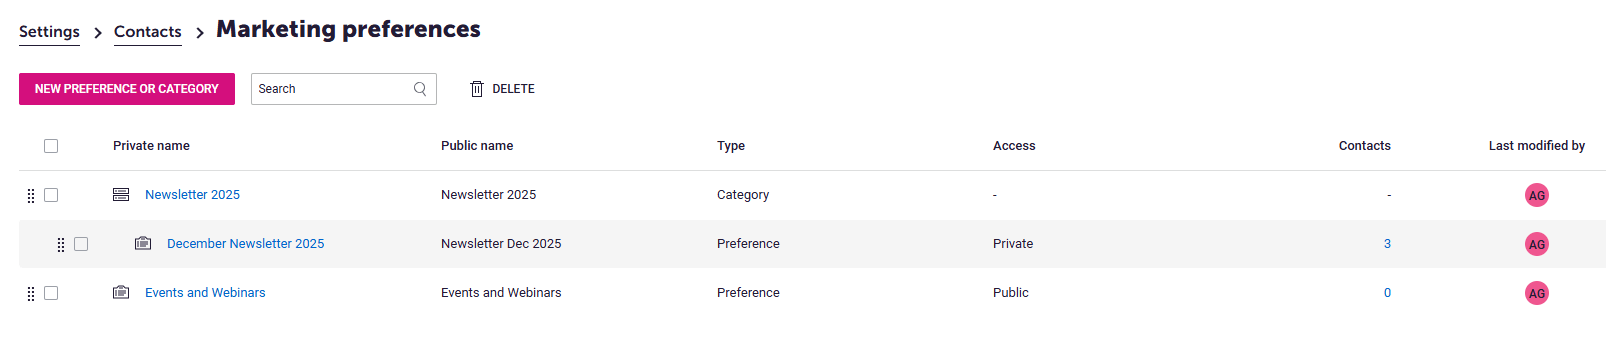
Both Types are supported but mapped slightly differently in Workbooks.
For more details on creating markerting preferences, please refer to the Dotdigital knowledge base:
https://support.dotdigital.com/en/articles/8198837-marketing-preferences-overview
In Workbooks, navigate to:
Dotdigital Integration → Field Mappings → +Add
Mapping Preferences Within a Category
If the Dotdigital preference belongs to a category, it is treated as nested field. The full path must be specified.
Example:
- Workbooks field: Pref – Customer Newsletter (Person only)
- Dotdigital field: Newsletter 2025 > December Newsletter 2025 (Path: Category → Marketing Preference)
Mapping Standalone Preferences
If the Dotdigital Preference is not within a category, no path is required.
Example:
- Workbooks field: Pref – Events/Webinar (Person only)
- Dotdigital field: Events and Webinars
Examples
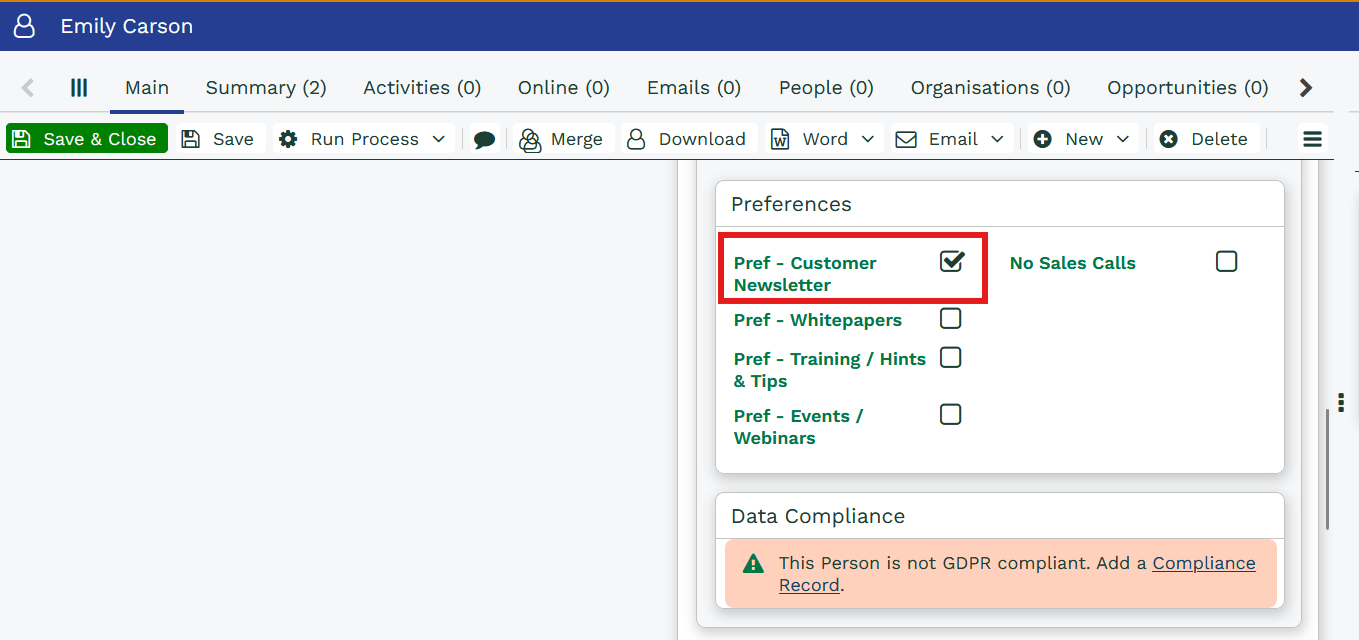
In the screenshot below, you can see that for the person record Emily Carson in Workbooks, the ‘pref-Customer Newsletter’ checkbox is selected. As this field is mapped to the nested Dotdigital marketing preference ‘Newsletter 2025 > December Newsletter 2025’, Emily’s profile in Dotdigital has been updated to show that she is opted in to this marketing preference.

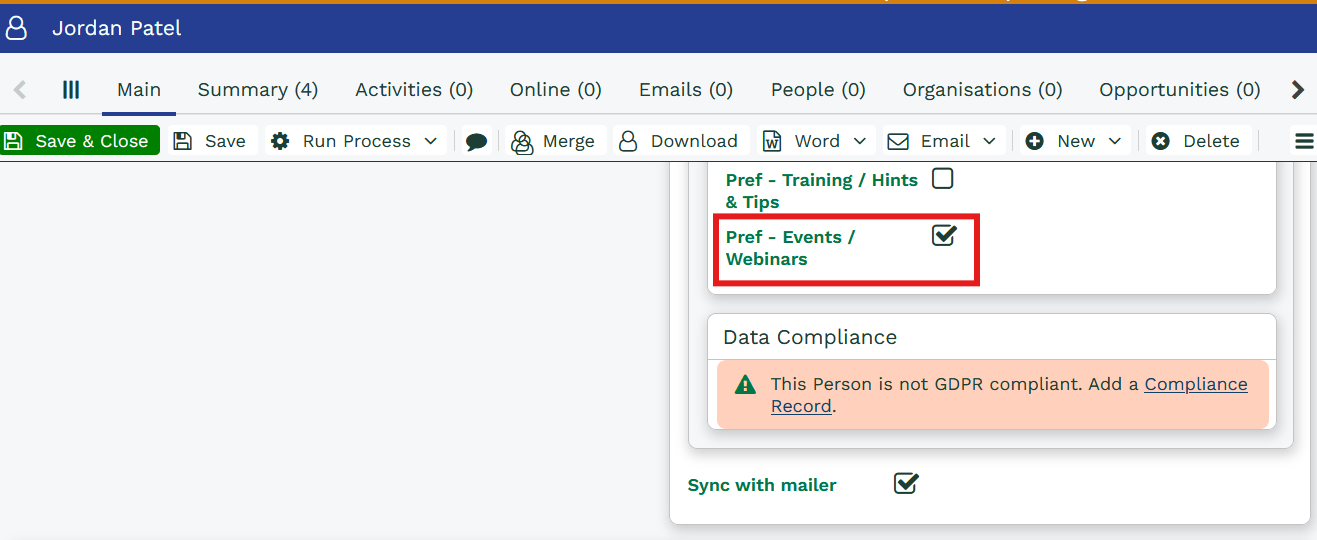
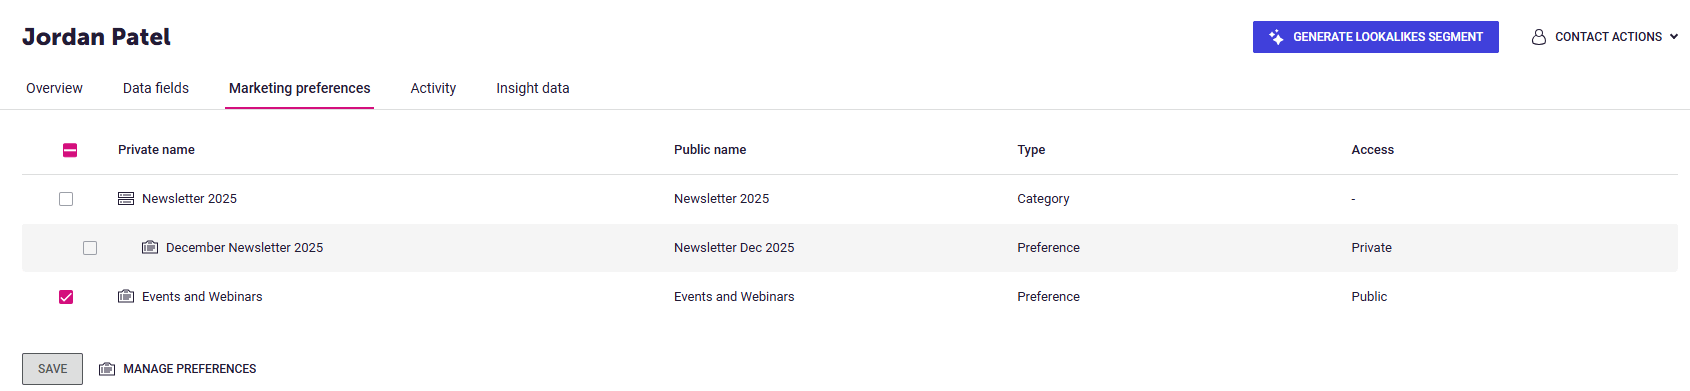
In the screenshots below, you can see that for the person record Jordon Patel in Workbooks, the ‘Pref-Events/Webinar’ checkbox is selected. As this field is mapped to the Dotdigital marketing preference ‘Events and Webinars’, Jordon’s profile in Dotdigital has been updated to show that she is opted in to this marketing preference.
Important Note:
If a new field or marketing preference mapping is added after the sync has already been enabled, you may see an error message like the below:
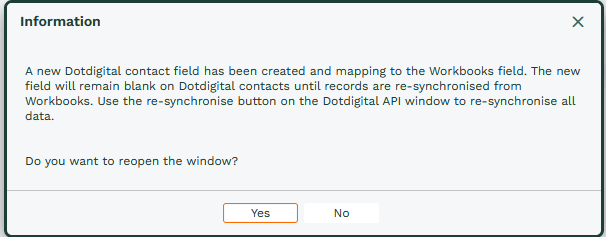
This indicates that the newly created Dotdigital Field will only be populated on already synced contacts when a re-sync is run. Depending on the number of records in Workbooks and Dotdigital, this process may take some time.
Therefore, please confirm all required fields and Marketing Preferences before enabling the sync
Activity Sync
Within Workbooks, you can control which Email and Web Activities should sync into Workbooks. We recommend syncing only the information that is useful.

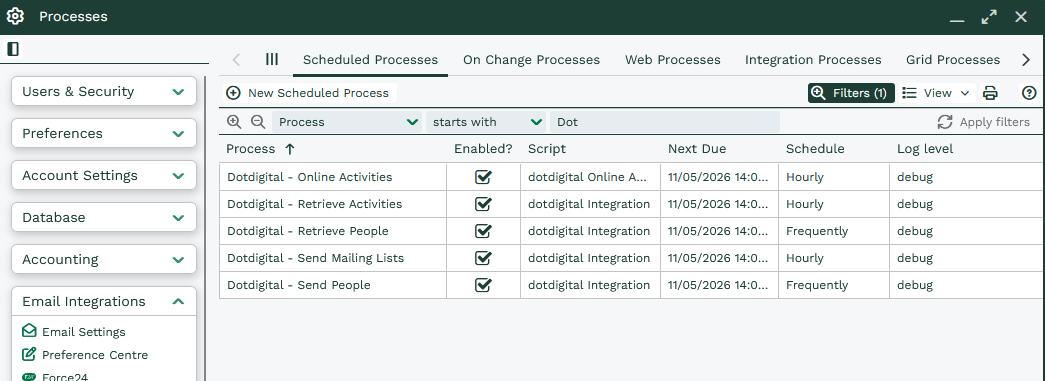
Dotdigital Processes
Once configured, click ‘Start Sync’ to automatically create a set of scheduled processes that facilitate communication between Workbooks and Dotdigital.
Below is the screenshot of processes used by Dotdigital
Dotdigital – Send People
The process will synchronize people records from Workbooks to Dotdigital and identify and sync new people to Dotdigital under the following conditions:
- The email address is not blank
- The email address is not linked to another Dotdigital contact
- The “Sync with Mailer” checkbox is enabled on a person record.
- NOTE: By default, this checkbox is ticked on people record, so please untick it and then select only the people you want to keep it enabled for. This ensures that only those contacts are sent to Dotdigital. Also, once the sync is enabled and new people are added to your database, the ‘sync with Mailer’ checkbox will be ticked, you can set a scheduled bulk action to untick the people you wish not to sync across.
When the Dotdigital contact ID is blank, the process will also sync updated people to Dotdigital when:
- The Dotdigital ID is not blank
- The ‘Update At’ date is after the last sync
Deleted People Detection: The process will detect and handle deleted people records as follows:
- If a person is deleted in Workbooks and no other record in Workbooks uses the same email address, the contact will be deleted in Dotdigital.
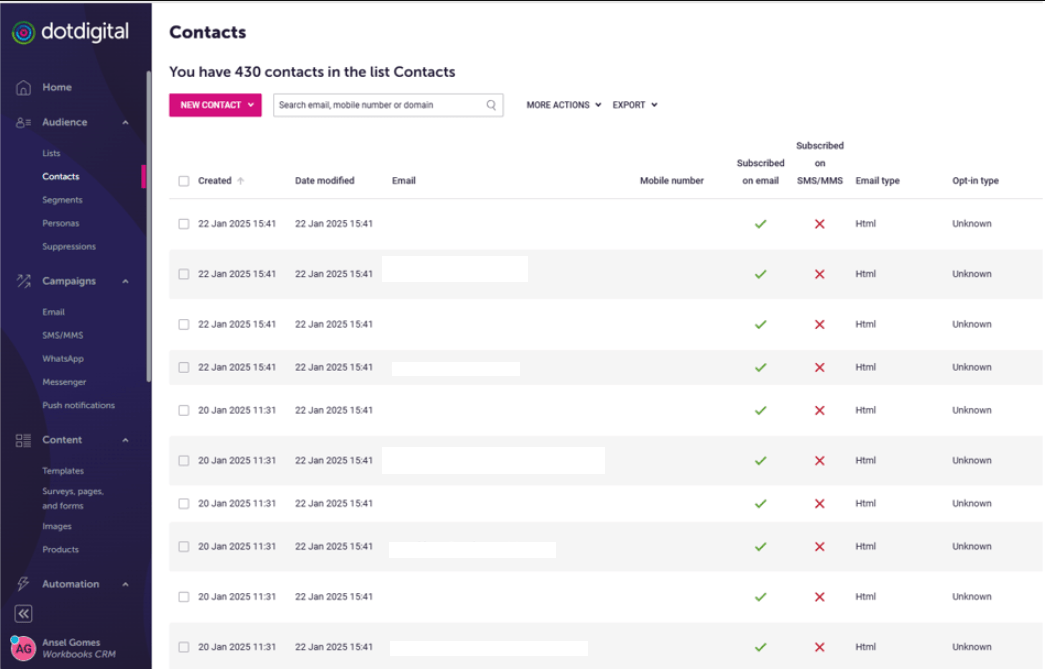
- If another person record in Workbooks uses the same email address and the records are merged, the Dotdigital contact will be updated accordingly. Contacts from Workbooks get synced automatically by the process to the Contacts tab Under Audience in Dotdigital
- If the ‘No Email’ checkbox is ticked on the person in Workbooks, there will be added to the suppressions list in Dotdigital
Dotdigital – Retrieve People
This process will
- Fetch People from Dotdigital to Unsubscribe, when contacts are unsubscribed the ‘No Email’ box gets ticked in WB.
- When a contact is Re-subscribed in Dotdigital, the ‘No Email’ checkbox is unticked in Workbooks
- Create new People in Workbooks if new contacts are created in Dotdigital for example anyone who creates a form fill
Dotdigital – Retrieve Activities
- Retrieve Online Activities into Workbooks from Dotdigital. Its display/lists the online activities on a person record within Workbooks on the “Online Tab” tab.
- Here is a list of the activity types we bring back into workbooks: Email Send, Email Open, Email Click Through,Email bounce,Unsubcribe,Web Form Submission,Web Page View, Download.
- Proxy Mailshots are also created in Workbooks as a copy of the Campaign in Dotdigital, so that Online Activities for email interactions can be related to the relevant Mailshots.
dotdigital-Online Activities
- Some activities do not contain the Contact ID when they are retrieved from DD so the script is not able to connect the activity with person so the process scan the online activities of that type which don’t have the related person and tries to match correct person and creates the relations.
Dotdigital – Send Mailing list
The process will:
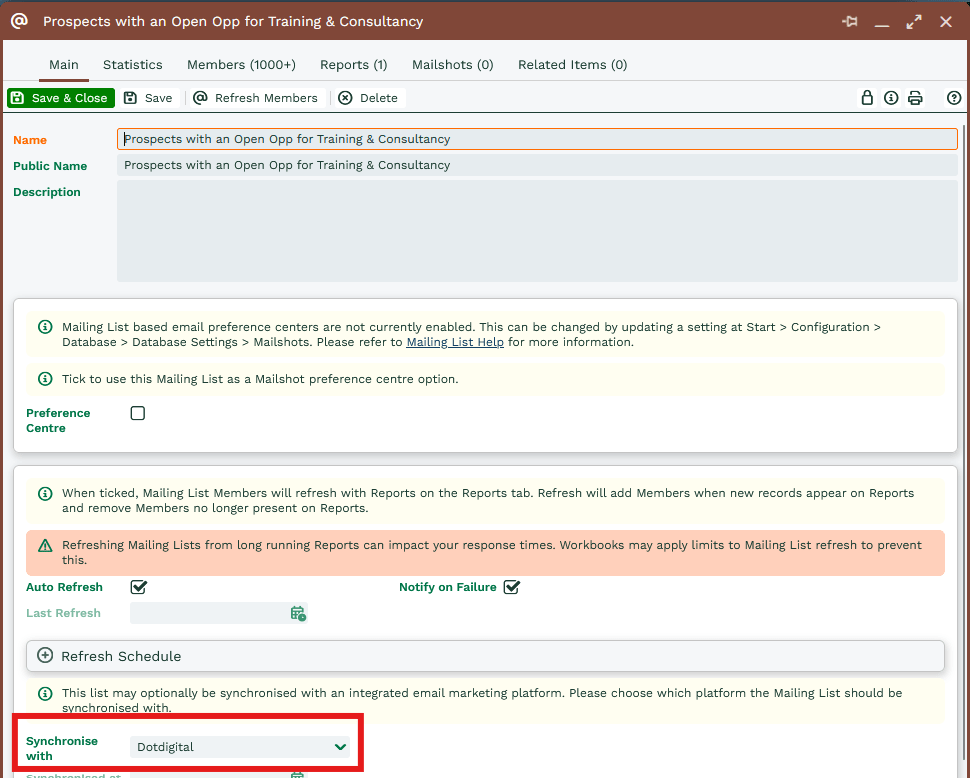
- Sync ‘Mailing List’ from Workbooks and create Lists where the ‘Synchronisation with’ field equals “Dotdigital”
- Sync Members to List in Dotdigital
1. Adds new Members
2. Removes deleted Member
- In some cases, complex segmentation may only be possible with a Workbooks Report, then building a mailing list in Workbooks which needs to be sent/synched to Dotdigital. For example you may want to segment on order data in Workbooks and mail that group of people (This data would not be readily available in Dotdigital, so would require segmentation to firstly be done in Workbooks.)
Understanding Campaigns and Mailshots in Dotdigital and Workbooks
In Dotdigital, mailshots are referred to as “campaigns”, and each email send is treated as an individual campaign. When you send a campaign from Dotdigital, a proxy mailshot is automatically created in Workbooks for tracking purposes. It’s important to note that email sends are not initiated from Workbooks – all sends take place within Dotdigital.
Unlike Workbooks, where multiple mailshots can be linked to a single campaign record for reporting and tracking, Dotdigital treats each send as a standalone campaign. However, you can use folders in Dotdigital to organize related campaigns (e.g. “Spring Sale 2025 – Launch”, “Reminder”, “Final Call”) under a common theme. This helps group related email sends for better structure and visibility.
To learn how to create and send a campaign in Dotdigital, refer to the following articles from Dotdigital Support:
- Create and send an email campaign – https://support.dotdigital.com/en/articles/8198854-campaign-setup
- Campaign send settings – https://support.dotdigital.com/en/articles/8198858-campaign-send-settings
- Review and send your campaign –
https://support.dotdigital.com/en/articles/8198859-review-and-send-your-campaign
Note
In Dotdigital, both the email address and phone number act as unique identifiers. So, for example, if the email address is unique but the phone number already exists in Dotdigital, that contact won’t sync from Workbooks to Dotdigital.