


Authentication with ON24
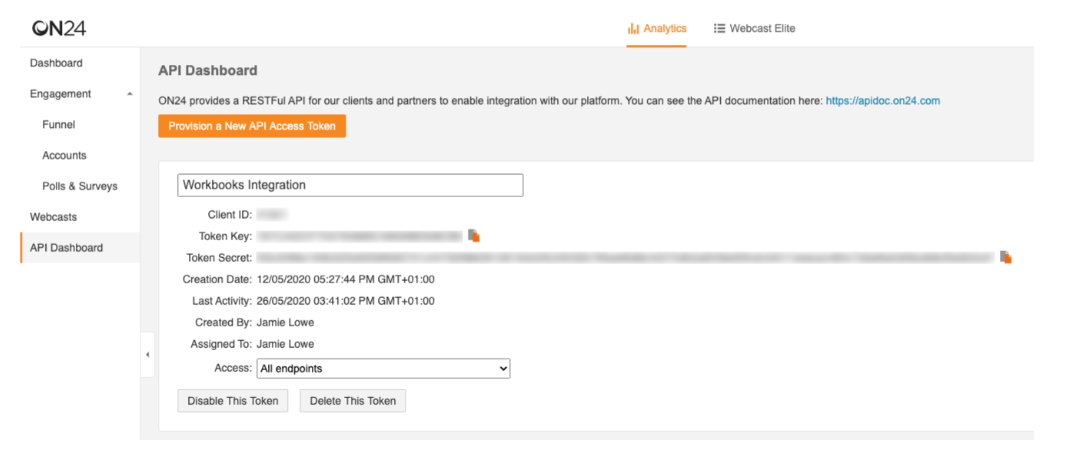
To allow Workbooks to authenticate with your ON24 account you will require an API Token which can be created within the ON24 UI. Under Analytics > API Dashboard, click Provision a New API Access Token. The values shown on screen will need to copied into Workbooks.
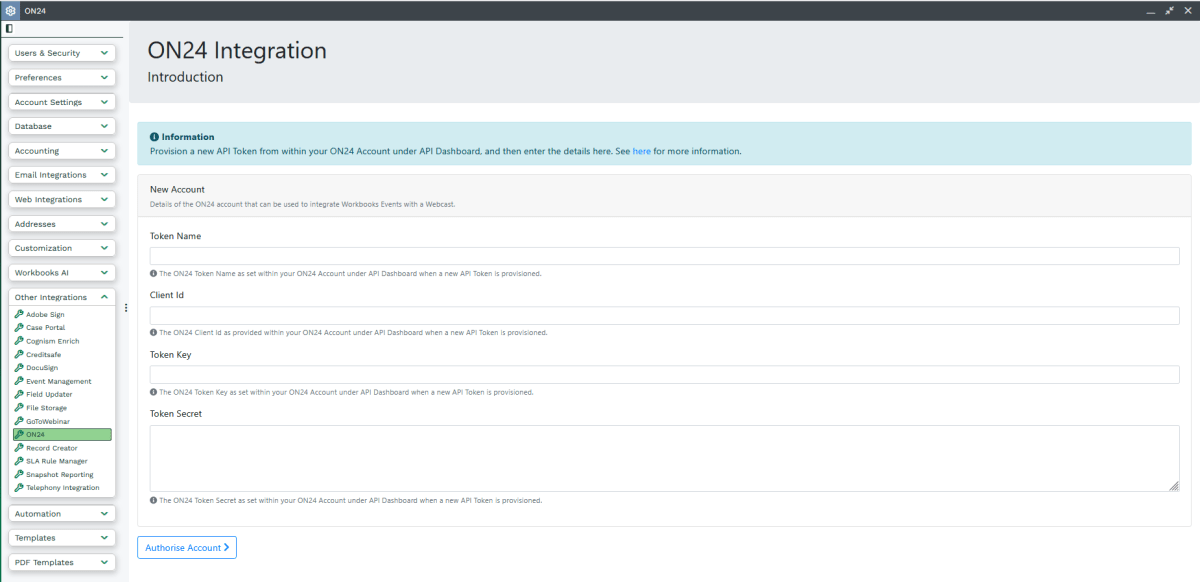
In Workbooks, click Configuration > Email & Integration > ON24. If this is the first time you have authenticated an account, a form is displayed asking for the details generated in ON24 as follows:
- Token Name
- Client Id
- Token Key
- Token Secret
Otherwise, if your Workbooks instance has an account authenticated already, you will see a list of of authorised ON24 accounts. Select “Setup New ON24 Account Authorisation”, and then enter the authentication details from ON24. After entering all details from ON24 into the Workbooks setup screen, click Authorise Account.
Authorising Multiple ON24 Accounts
The integration supports the synchronisation of Webcasts to more than one ON24 account as required. Simply revisit the Plugin at any time and choose “Setup New ON24 Account Authorisation” from the list. Clicking Continue will show the above form again, where you can repeat the steps to authorise another account.
On an Event record, a field called ON24 Account allows users to choose which account they wish to sync the Event with before using the “Create Webcast” Process Button.

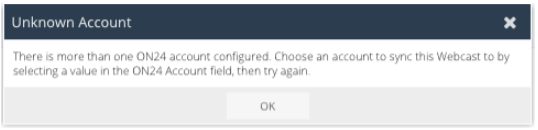
If your Workbooks instance has more than one account configured and you do not select an ON24 Account to use, an error will be displayed:
In the instance that your Workbooks database has only one ON24 account configured, then this account is used for all Events. Therefore, we’d recommend that the ON24 Account field is hidden from your Form Layouts as the field is ignored.