Configuring a Snapshot
Snapshots are configured from within their Custom Record window across 5 tabs:
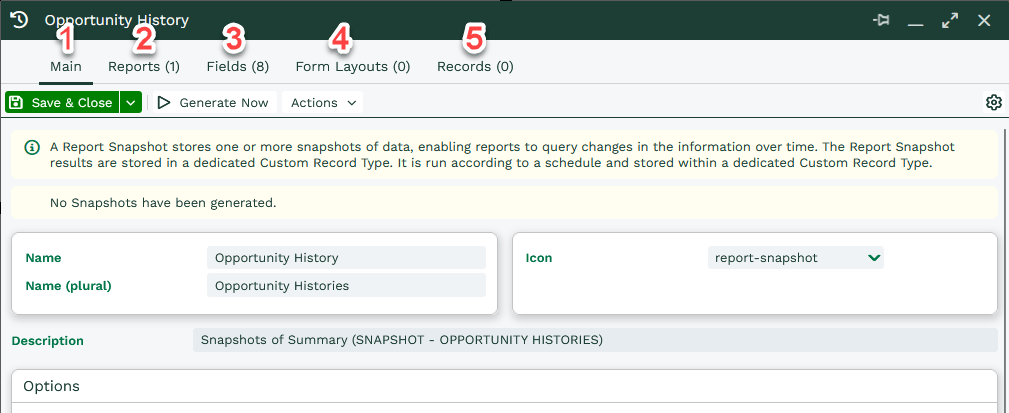
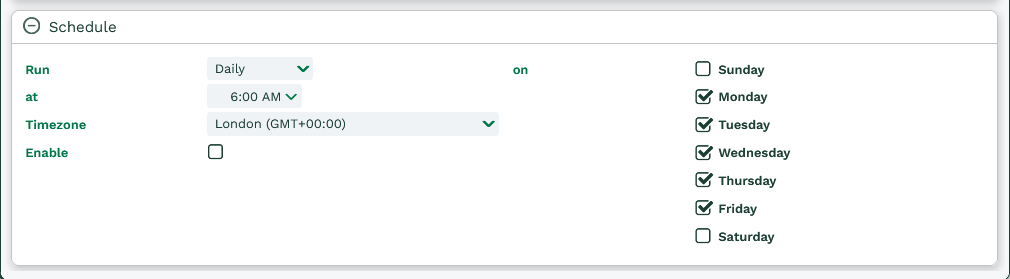
1. Main. From the main tab you can change information about the Snapshot such as the name, icon and description. You can also change both the Data Retention (how long each set of Snapshots is kept) as well as whether or not new fields are automatically added to the Snapshot record. Similar to processes in your Workbooks database, you can set a schedule for the Snapshot to run on. This will define how often each batch of Snapshot records are created so consider your retention setting when choosing an option.
2. Reports. Within the Reports tab, you can manage the data being imported into the Snapshot. Data from multiple Reports can be added at one time, provided it is configured correctly. Reports can be added via the Add Report button or removed via the ‘x‘ next to it’s row.
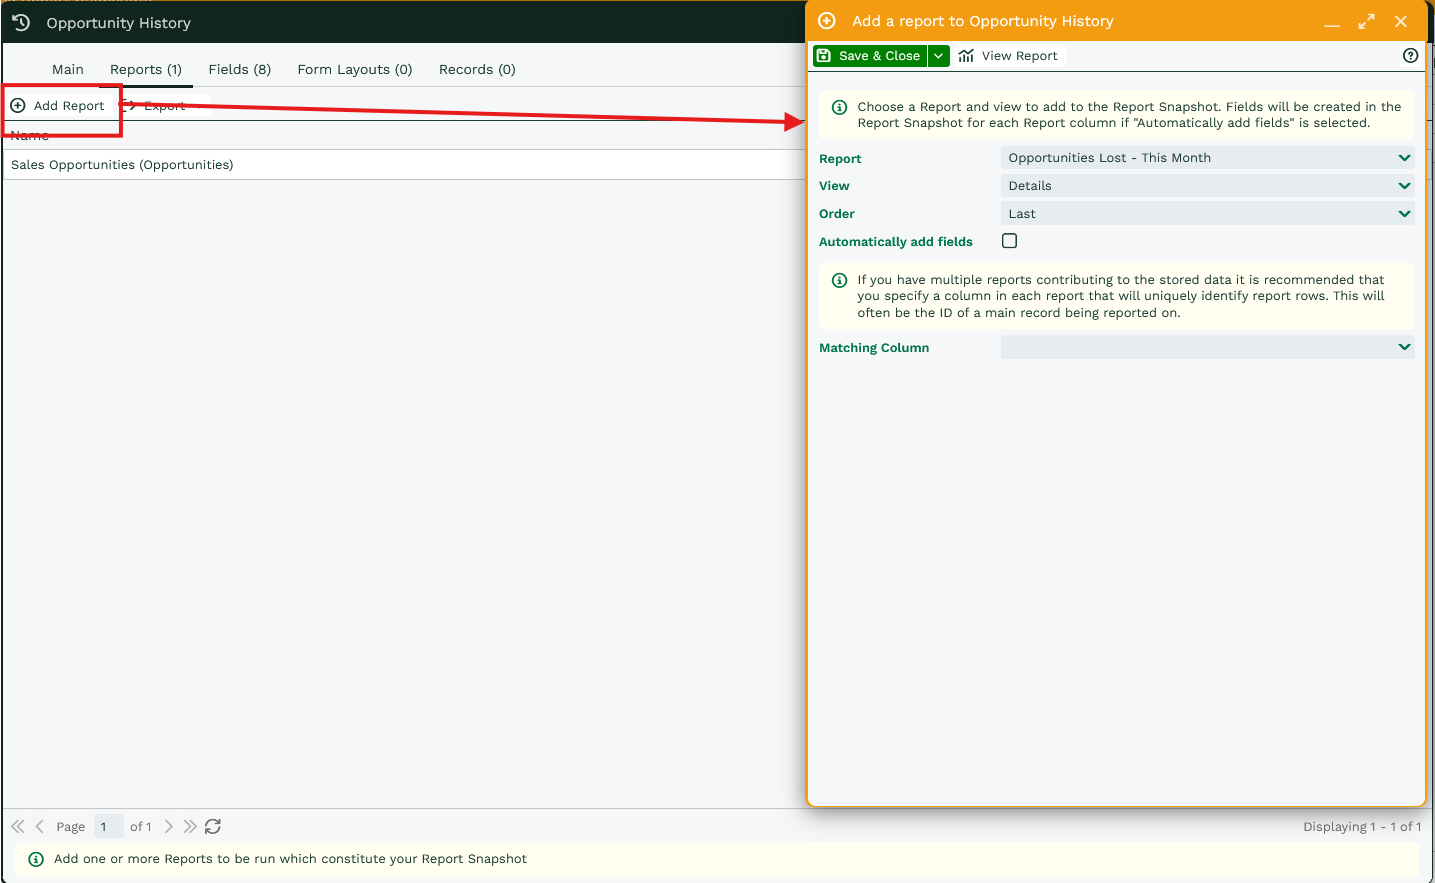
When adding a new Report it must be selected it by name and view. If you have multiple Reports contributing to the stored data it is recommended that a column is specified in each Report to uniquely identify rows. This will often be the ID of a main record being reported on.
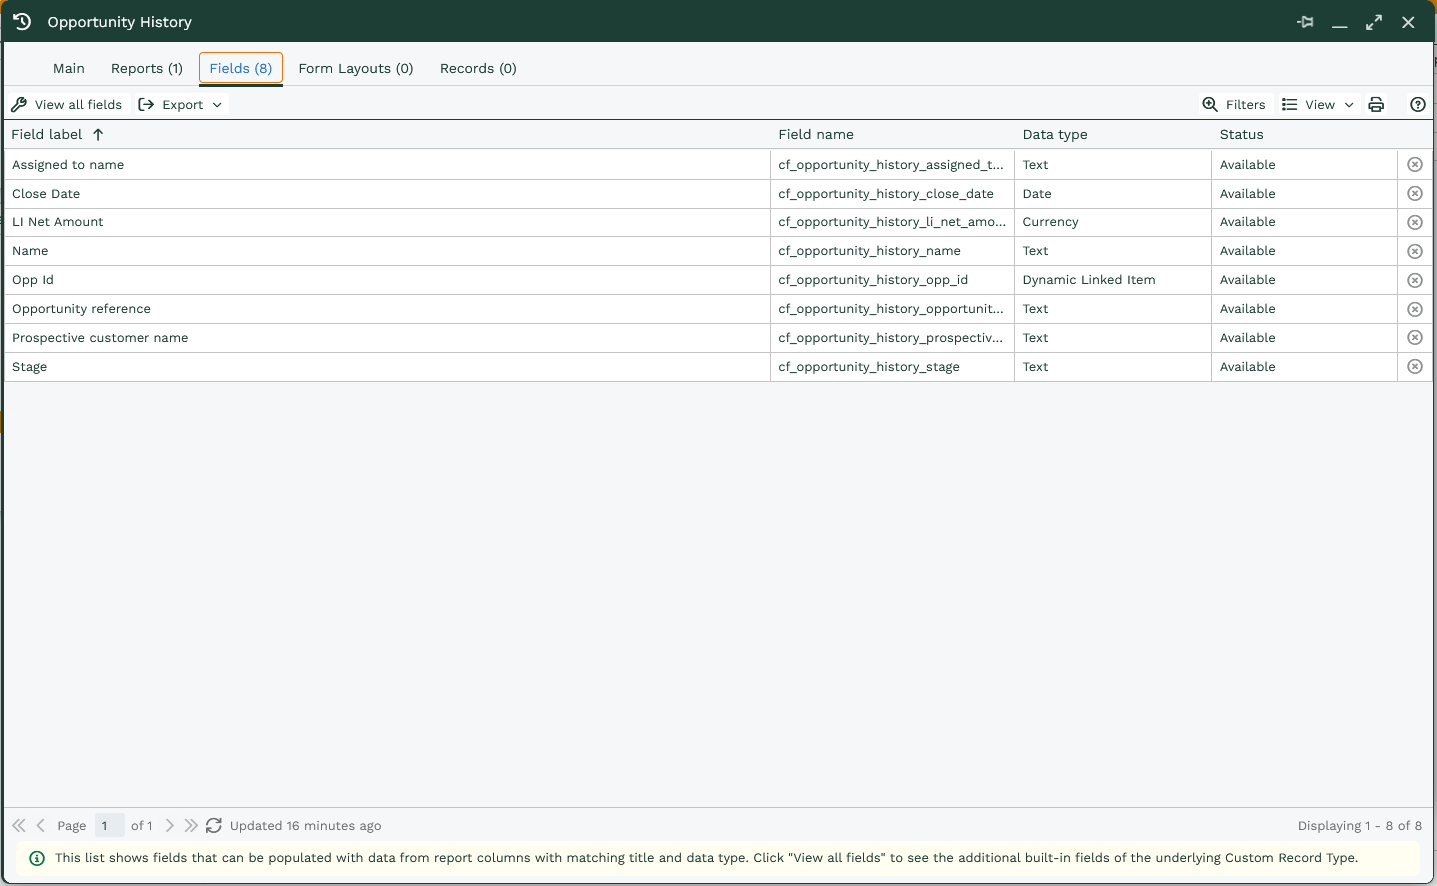
3. Fields. Within the Fields tab, you can manage the fields currently being mapped from the Report(s) onto the Custom Record. If Automatically add fields has been ticked, all fields in the relevant Report will display here. Fields are created on the Custom Record of the relevant type in which they display in the Report. ID columns will be created as a DLI, allowing a user to open the relevant record directly from the Snapshot.
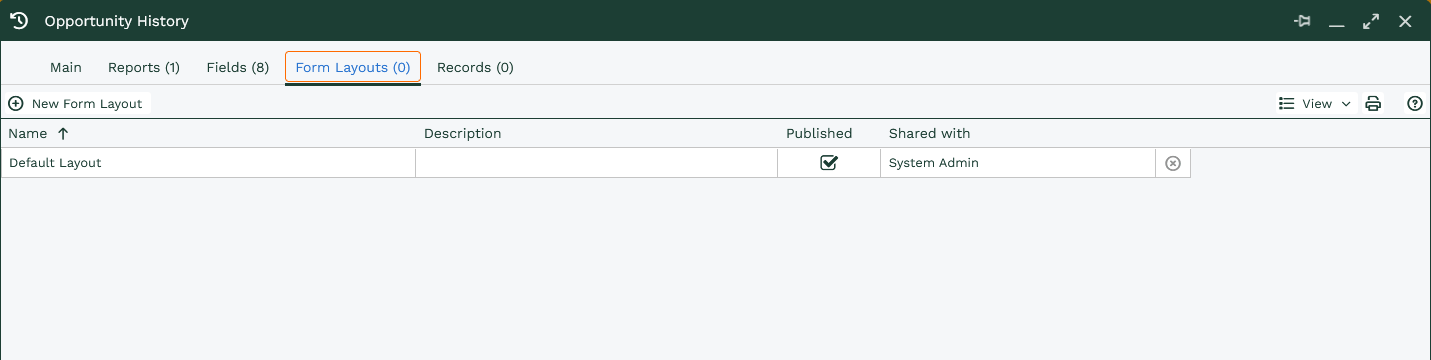
4. Form Layouts. Much as you can with other record types, you can manipulate the fields’ location on the resulting Snapshot form via Form Layouts. See our page here for more information on how to do this.
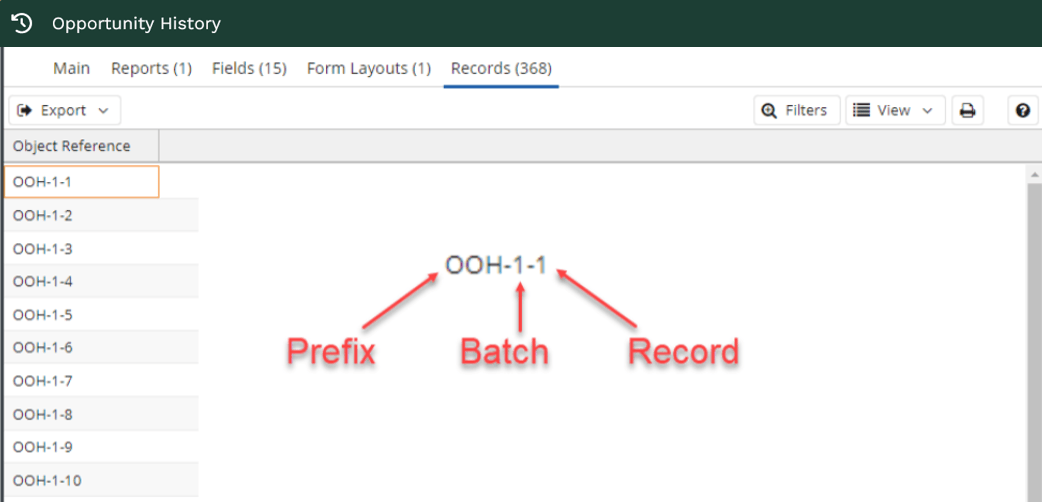
5. Records. The Records tab will show all Snapshot records of this type. From here any of the Snapshot records can be opened to display the data relating to that row at the time of Snapshot. Snapshot records will appear with a reference that shows both the batch and the individual record number within the batch.