


Creating a Document with a Workbooks PDF
A guide on how to setup a DocuSign Document that utilises the Unified PDF Template
The DocuSign integration allows you to use either Workbooks PDFs or DocuSign Templates. This article covers how to setup a Workbooks PDF to use with the integration. This article assumes that you already have an existing PDF template to use with the integration. If you require a custom template to be developed, please contact Workbooks Support team or speak to your Account Manager for further information. Before continuing with the Plugin, ensure that you have uploaded your PDF Template to Workbooks.
For Workbooks PDFs, you do not need to login to DocuSign to configure anything – all setup is completed within Workbooks. To access the integration configuration, click Start > Configuration > Other Integrations > DocuSign
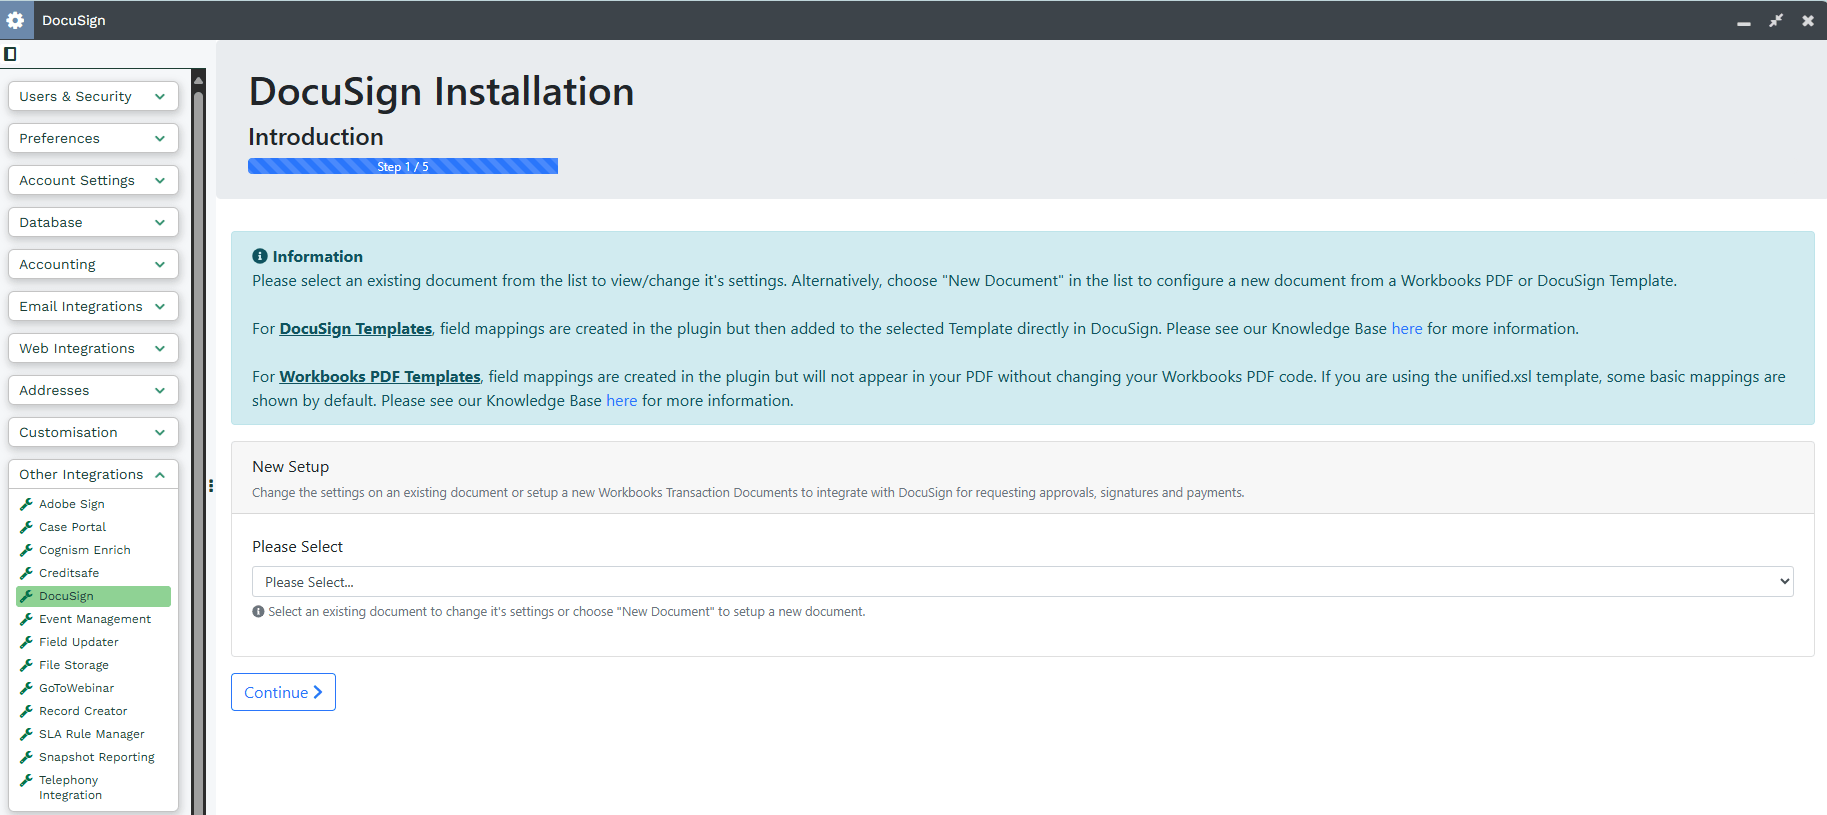
Step 1 - Introduction
On the first page, select New Document then Continue. If this is the first document that you have configured, then you will taken straight to Step 2 below.
Plugin - Step 2 - Settings
Work through the Plugin settings, configuring them to your requirements as needed. See here for further information on each setting.
There are a few important settings that must be configured as detailed below for the integration to work with a Workbooks PDF Template:
- Select Workbooks PDF in the Integration Type picklist
- Select the relevant PDF Template Workbooks PDF Template picklist
- Select the Fields that will make up the PDF Name that is sent to the customer (defaults are applied if nothing is selected, for CASE, Transaction Documents and Opportunties it will be Customer name, for PERSON it will be Person name and for ORGANISATION it will be the Organisation name)
Click “Continue” when you are happy with the settings.
Step 3 – Configure AutoPlace Mappings
This step allows you to configure fields from your selected Workbooks record type to populate fields on the DocuSign document. The integration has the capability to default the field values on the DocuSign document to the value held within Workbooks. When the document is signed, the updated information can be reflected back in Workbooks.
For each mapping that is added here, the relevant Anchor String needs to be added to your Workbooks PDF code. The Anchor String must be a unique string in the PDF when it is generated, otherwise an interactive DocuSign Tag will be shown in all places where the Anchor String is repeated.
Workbooks recommends that Anchor Strings are added in the format “/TAG_NAME/” to minimise the risk of erroneous tags appearing in your document. We’d recommend that the Anchor String is also displayed in white font so that the user cannot see the text used by the integration, they will only see the DocuSign Tag which is placed automatically at the top left corner of the Anchor String when the document is generated.
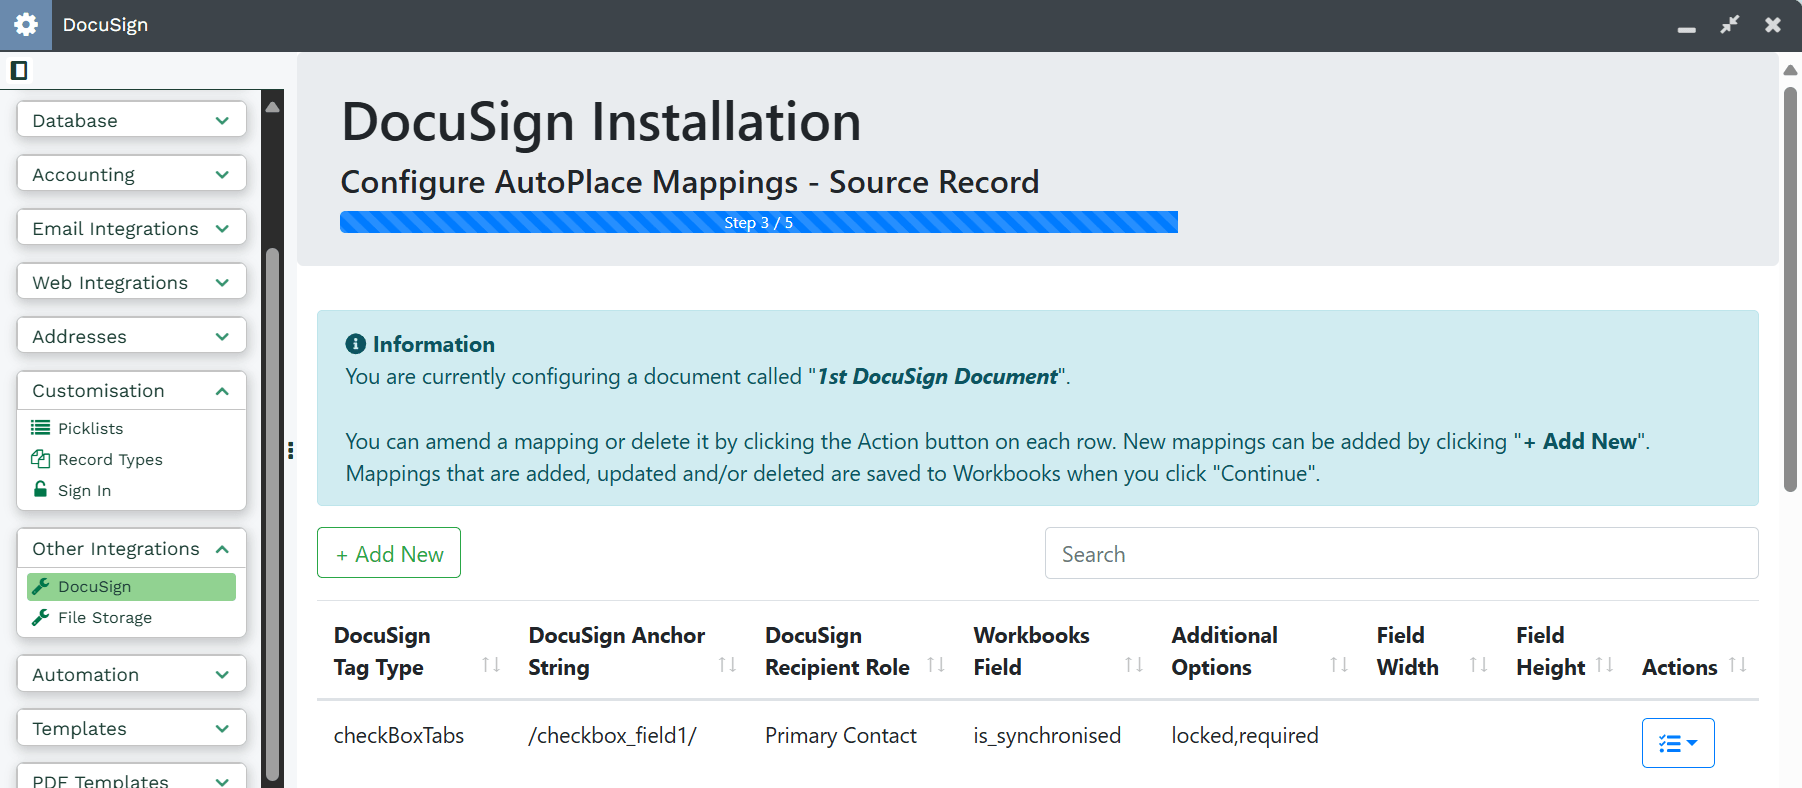
To set up a new Mapping select the Add New button. In the dialogue box, populate the following information to create a new field mapping
- Docusign Tag Type: The DocuSign Field data type. The Tag Type can affect how data is displayed on the Document, more information can be found on DocuSign’s Support Site. Based on the Workbooks Custom Field type, we recommend reviewing this page which details the best type to use for the integration.
- DocuSign Anchor String: This defines where on the document the tag will appear if the tag is found by DocuSign in your template. See here for DocuSign’s help page on Anchors.
- DocuSign Recipient Role: Although shown, this picklist can be left blank for DocuSign Templates.
- Workbooks Field: Select the field which will be used to initially pull through a value to the DocuSign Field. This field can then be updated if the field is made editable in the below setting. Otherwise, ensure you select Read Only below.
- Multi-select picklists are not supported in DocuSign and therefore, if configured in Workbooks, do not show in this list
- Picklist selections may break if they contain a semi-colon in the value, due to a limitation in DocuSign
- Additional Options: These options apply to the field when the recipient receives the document. Fields can be made: Editable, Read Only, Required, Hidden or Optional.
- Field Height: The height of the tag that appears on your document in pixels.
- Field Width: The width of the tag that appears on your document in pixels. If left blank, the default is set to 100.
Once you have added a mapping, it can be edited or deleted using the Actions button beside each row. 5 mappings are shown per page. A search feature is provided if you have several mappings – you can search by DocuSign tag name, DocuSign field type or Workbooks field name. Mappings are not stored until you click Continue.
Step 4 - Related Record Mappings
If you turned on the Update Related Records setting in Step 1, then a 2nd Mappings screen is shown. This screen allows you to configure mappings for fields that are on records related to the source record via a DLI field. For example, you may have a Contact DLI which relates a Person to your source document – this screen can be used to
The process for adding mappings is the same as Step 3. However, there are two slightly different options:
- Workbooks DLI Field: This is a list of all DLIs on the selected record type set in Step 1
- Workbooks Field: A DLI is driven from a report based on a record type. Once you select a DLI, this list will be populated with the fields from that record type.
- For example, if you have a Person DLI, the report will be based on People and thus the fields shown here will be for People records.
- This feature only allows you to drill through to one record. You cannot subsequently drill through to another record related to the first.
Again mappings can be edited or deleted using the Actions menu. They can also be searched. Changes will not be applied until you click Continue.
As per mappings for the Source record, Anchor Strings will need to be added to your PDF code to show these Tags when the document is generated.
Step 5 - Configuration Complete
The integration configuration for this document is now complete is ready to be generated and will now need to be added to the appropriate Form Layouts via a Button Process. This is fully documented here.
