


Record Templates
Record Templates allow you to create a new record, with pre-filled values in fields of your choice. For example, if you set the Priority field to “Low” then every time you create a new record using this template the Priority will be set to “Low” automatically (but can be changed manually later, if required).
Everywhere a record can be created, the record templates that have been made available for that record type can be used.
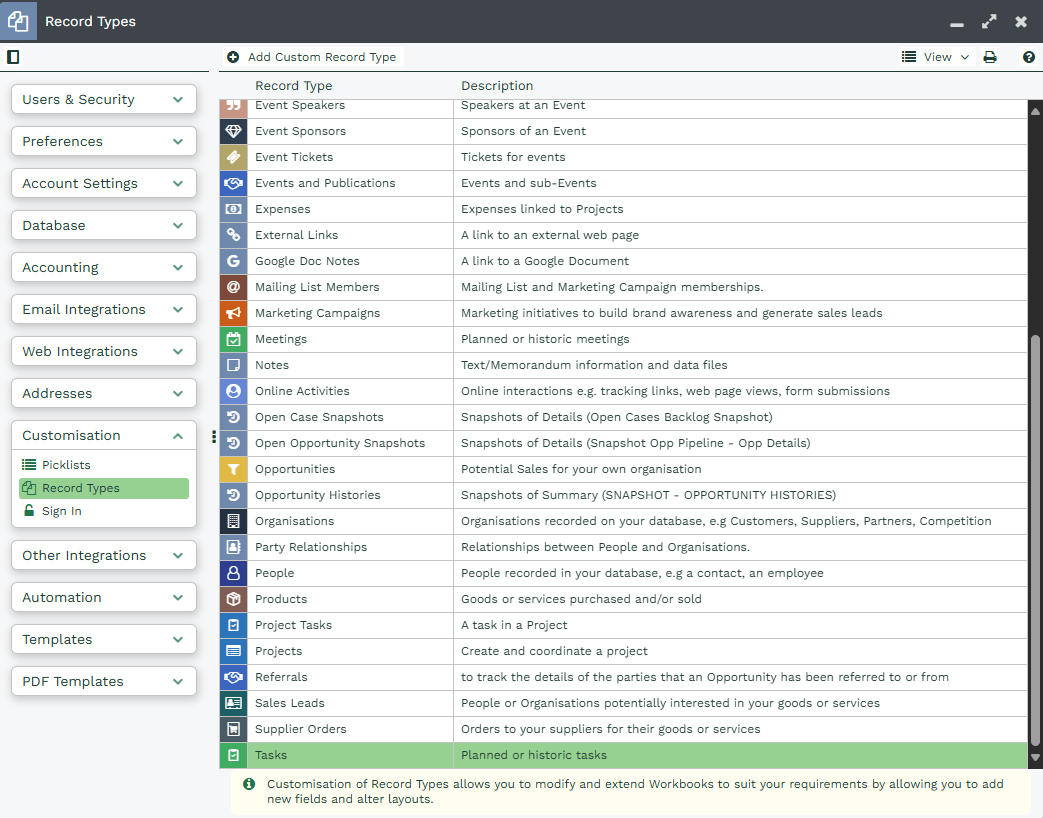
To create a new record template, click Start > Configuration > Customisation > Record Types > [select type of object] > Record Templates > New Record Template.

How to create record templates
Within Tasks create a Task Record Template here to setup an “On Site Visit” template. Create a new Record Template using the above method:
- (1) Set the name: It’s important that you do not include apostrophes in the naming of your Record Templates as doing so will cause problems with the rendering of your Workbooks User Interface.
- (2) Set the description: This will help users to identify where each Record Template is being used on your database.
- (3) Set the context: For Tasks and Meetings there is an extra field on the Template form called Context.
- Use the dropdown to select ‘Schedule’ if you want the template to apply to Tasks or Meetings scheduled to happen in the future.
- If the template is to be applied to Tasks or Meetings that have already happened, choose ‘Record’. These Tasks and Meetings will automatically be given a status of Complete (and thus will have an Associated State of Closed).
- (4) Published Checkbox: Make sure to tick the checkbox next to Published otherwise the template won’t be available for use within your database.

Next, we need to set the fields that we wish to have a default value. You’ll see a list of greyed out fields (5) at the bottom of the newly created Record Template. These are the fields that do not currently have a value set. NOTE: if you want to set a default value for a Custom Field, that field must have the ‘Show by default’ checkbox ticked, otherwise you won’t see it in the list of available fields. We’ll use “Priority” in this example, click on it to open:
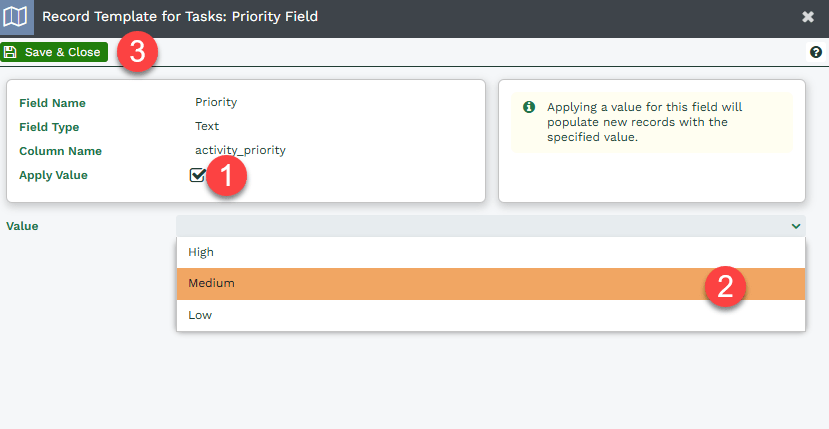
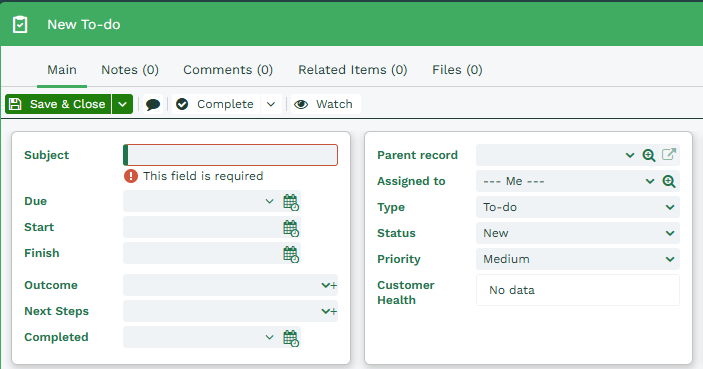
- (1) Apply Default Value: Put a tick in the checkbox next to Apply Value, which allows you to enter a value in the (2) Value field. You can use the dropdown picklist to select an existing value or type in a new one. Let’s add Medium. This status will be filled in automatically when a new Task is created using this template.
- Click (3) Save & Close.
You can set as many default values as you like including any Custom Fields that you might have configured. If you choose to add a default value on the “Assigned to” value, it’s worth noting that if you set the value to “Me”, every record created using that template will show your name in the Assigned to field, not the creating User’s name.
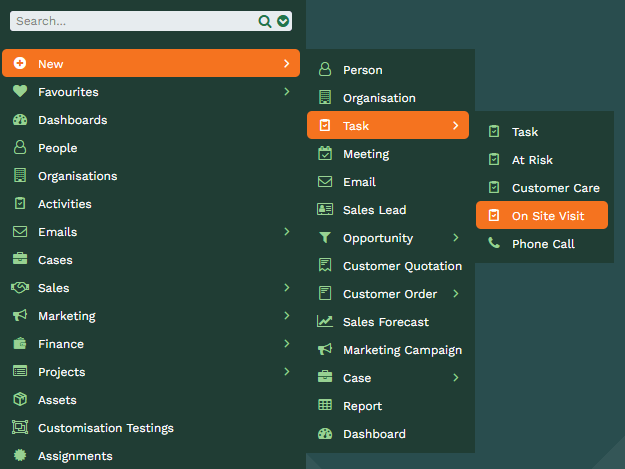
When you are happy, remember to click Save & Close on the Record Template itself. In order to give other Users access to your Record Template you must modify the Sharing permissions by clicking on the Sharing Padlock. Until then, only Users in the System Admin group will be able to see and access the template. Now Users with whom the template has been shared will see the option when clicking Start > New > Task:
NOTE: By combining these Record Templates with Form Layout rules you can create/tailor any form design and name needed. For example, you could create two different types of Case: internal and external with different fields auto-populated for each type of Case.