


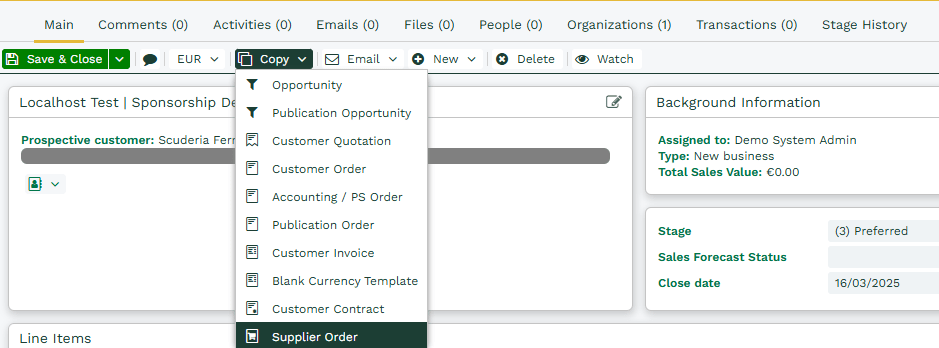
Copying Transaction Documents
To simplify the creation of Transaction Documents such as Quotations, Orders, Invoices and Contracts it is now possible to create a copy of any existing record to create another. When creating a copy you can choose whether to make a fresh copy of the same type of record or use the data to create a different record type, such as copying an Opportunity to a Customer Quotation or a Customer Order to a Customer Contract. This can be accessed by using the Copy button found at the top of all Transaction Documents.
This can save a great deal of time, as documents do not need to be created manually. The data will be copied over identically which reduces the risk of human error and the new record can be automatically related to any Notes, Activities, People or Organisations associated to the original record.
The copied document is initially created in a DRAFT state, so that any edits can be made including date changes and adding or removing line items before it is POSTED.
NOTE: Copying a Document will copy over data in all Custom Fields providing that an identical Custom Field exists on the target record. In order to be considered identical, the Field Type, Data Type and Field Label must all match.
A document can be copied multiple times, as for example, you may require multiple invoices to be created that are based upon a single order. You are also able to copy a document and create one with a specific Record Template that you may have configured for certain customers or sale types.
NOTE:When copying a Transaction Document to create a Contract, remember to activate and populate the Line Items Start Date and End Date columns, otherwise the Line Items won’t appear on the Contract.
Once you have selected the Record type or Record Template you want to copy, a new window will then appear.
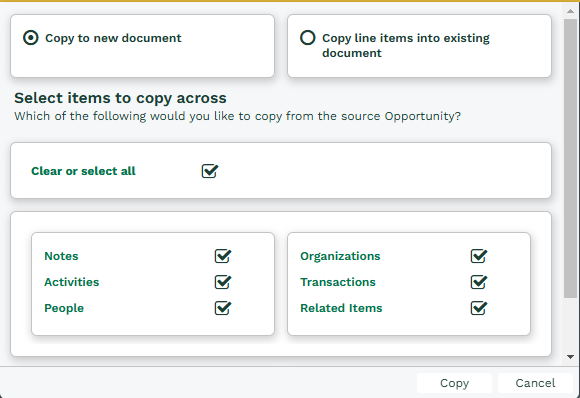
Here you will have the following options:
Copy to new document
This is the default setting used when copying a new document, here you can use the data from the current document to create a new document of your selected type, this will copy over the details from both the document header, as well as all of the Line Items. This is the most common use case as a part of the sales process, such as converting a Quote to an Order.
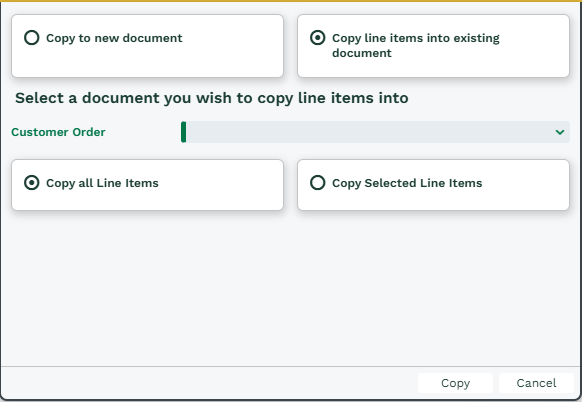
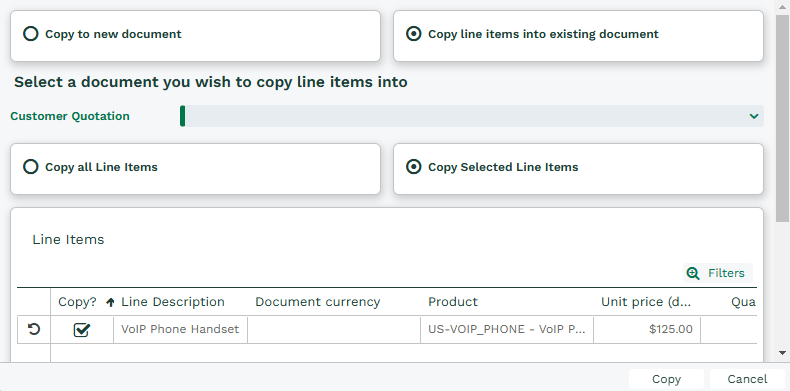
Copy line items into existing document
Rather than creating a new Transaction Document it is possible to copy over the Line Item information from your current document and add it to the Line Items of another Document. This can be especially useful when managing upgrade orders where Order Line Items can be copied from the Order to the Customer’s Contract.
Selecting copy line items into existing document will change the layout of the Copy Document Tool replacing the central section with a lookup of the respective Transaction Document type, so you can choose which document to update.
There are two database settings below that control which documents appear. These settings can be accessed through Start > Configuration > Database > Database Settings > Document Copy Settings.
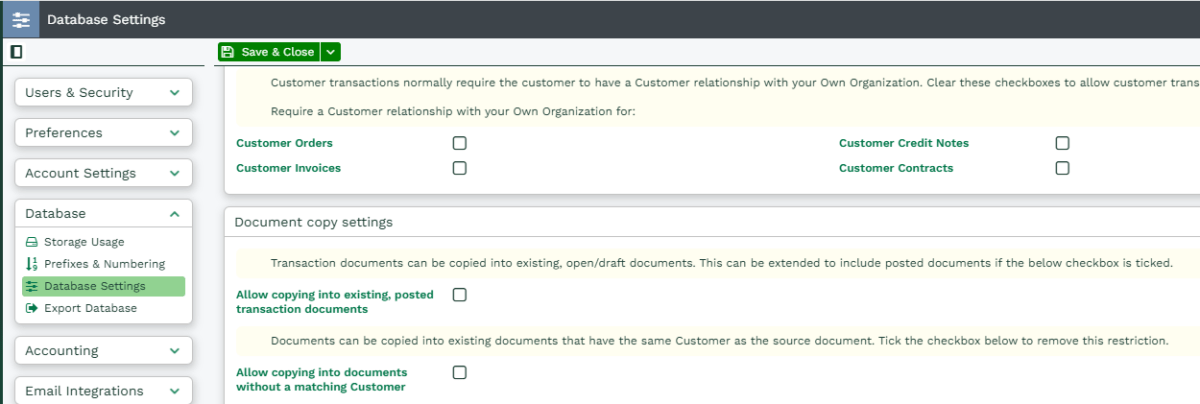
By default both of these settings are disabled, so you will only be able to update Draft documents where the customers match your source and target document.
Select items to copy across
From here you can select the additional Records that you want to copy from the Source Document to the newly created Document. This means that you can choose to include the existing associations to existing documents, as a part of your sales process or whether you want this new Record to be standalone and independent from previous records.
NOTE: When copying Transaction documents any relationships created via Dynamically Linked Items will be copied from the source document automatically, however for other relationship types this is not the case.
Copy all Line Items
By default when copying a Document it will select Copy all Line Items, giving you a like for like carbon copy of the original Document.
Copy Selected Line Items
It is also possible to Copy Selected Line Items to a new Document. This can be useful when creating Supplier Orders or Credit Notes that may only involve a subset of the original Line Items.
NOTE: This setting can be used when copying to a new or existing document.
Choosing Copy Selected Line Items will reveal a new section that displays all of the Line Items on the original Document, where you will see a checkbox column called Copy?
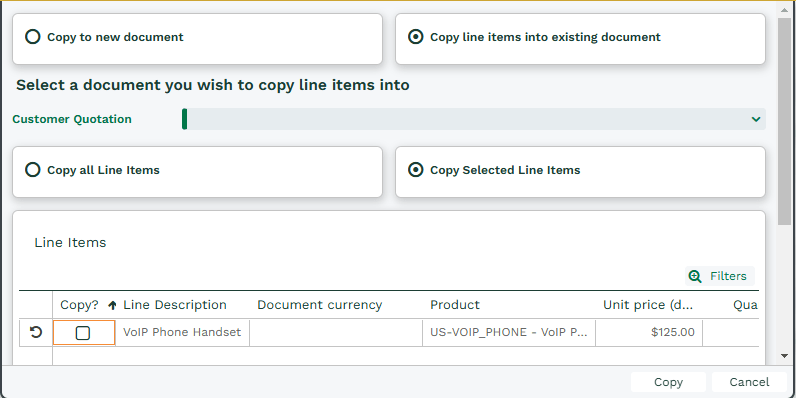
Selecting the Copy? Checkbox will highlight the Line Item for copying over and also provide you with an undo icon
NOTE: You are unable to modify any of the Line Items details from this view.
Once you have selected the Line Items you want to copy, use the Copy button in the bottom right hand corner of the screen and the new Document will then be created.